To put WordPress in maintenance mode, use a plugin like WP Maintenance Mode or create a custom maintenance page by adding a code snippet to your theme’s functions.php file.
What is Maintenance Mode?
Maintenance mode is a special state for your site. It shows a message to visitors. The message says your site is under maintenance. They cannot see your site until you finish.
Why Use Maintenance Mode?
There are many reasons to use maintenance mode. Here are some:
- To update themes or plugins
- To fix bugs or errors
- To add new features
- To test changes before going live

Credit: jetpack.com
Methods to Enable Maintenance Mode
There are several ways to enable maintenance mode. You can use a plugin. You can also add code to your site. We will cover both methods.
Using A Plugin
Using a plugin is the easiest way. Follow these steps:
- Log in to your WordPress dashboard.
- Go to Plugins and click Add New.
- Search for Maintenance Mode plugins.
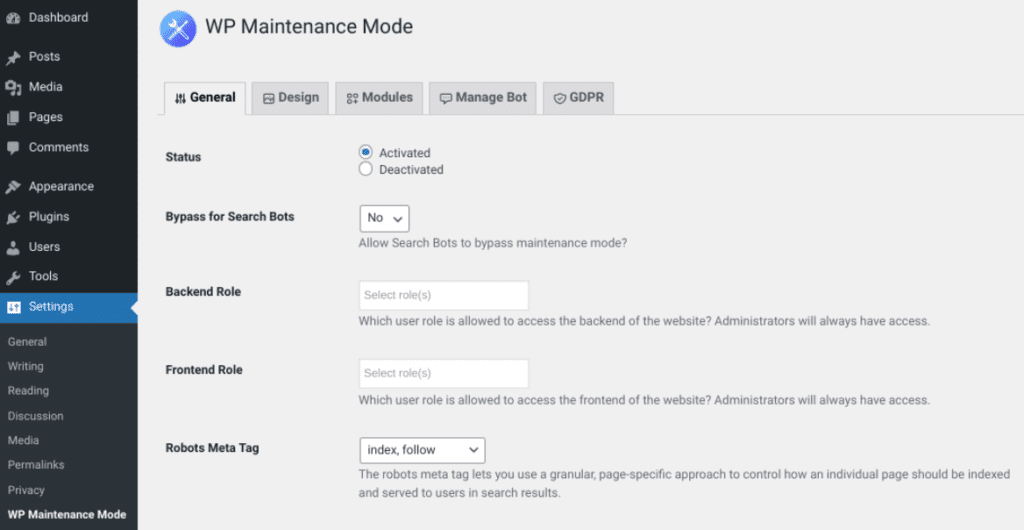
- Choose a plugin. We recommend WP Maintenance Mode.
- Click Install Now and then Activate.
- Go to Settings and find the plugin settings.
- Turn on maintenance mode. Customize the message if you want.
Adding Code To Your Site
If you prefer not to use a plugin, you can add code. Follow these steps:
- Connect to your site using an FTP client.
- Download your functions.php file. This file is in your theme folder.
- Open the file with a text editor.
- Add this code at the end of the file:
php
        function maintenance_mode() {
            if (!current_user_can('edit_themes') || !is_user_logged_in()) {
                wp_die('Maintenance, please come back soon.');
            }
        }
        add_action('get_header', 'maintenance_mode');
        ?
- Save the file and upload it back to your server.
- Your site is now in maintenance mode.
Customizing the Maintenance Page
You can customize the maintenance page. This makes it look better. Here are some tips:
Using A Plugin
If you use a plugin, go to the plugin settings. Look for options to customize the page. You can change the message. You can add images. You can change colors and fonts.
Using Custom Code
If you use code, you can customize it too. Here’s how:
- Open your functions.php file again.
- Replace the
wp_die()line with this code:
php
        function maintenance_mode() {
            if (!current_user_can('edit_themes') || !is_user_logged_in()) {
                echo '<h1Maintenance';
                echo 'We are working on our site. Please check back soon.';
                exit();
            }
        }
        add_action('get_header', 'maintenance_mode');
        ?>
Disabling Maintenance Mode
When you finish your updates, you need to disable maintenance mode. Here’s how:
If You Used A Plugin
- Go to your WordPress dashboard.
- Go to Settings and find the plugin settings.
- Turn off maintenance mode.
If You Used Code
- Connect to your site using an FTP client.
- Download your functions.php file.
- Remove the maintenance mode code you added.
- Save the file and upload it back to your server.
Best Practices for Maintenance Mode
Here are some best practices. Follow these to make sure your site is always user-friendly.
- Always inform your users before going into maintenance mode.
- Keep the maintenance period as short as possible.
- Customize the maintenance page with useful information.
- Include contact information in case users need help.

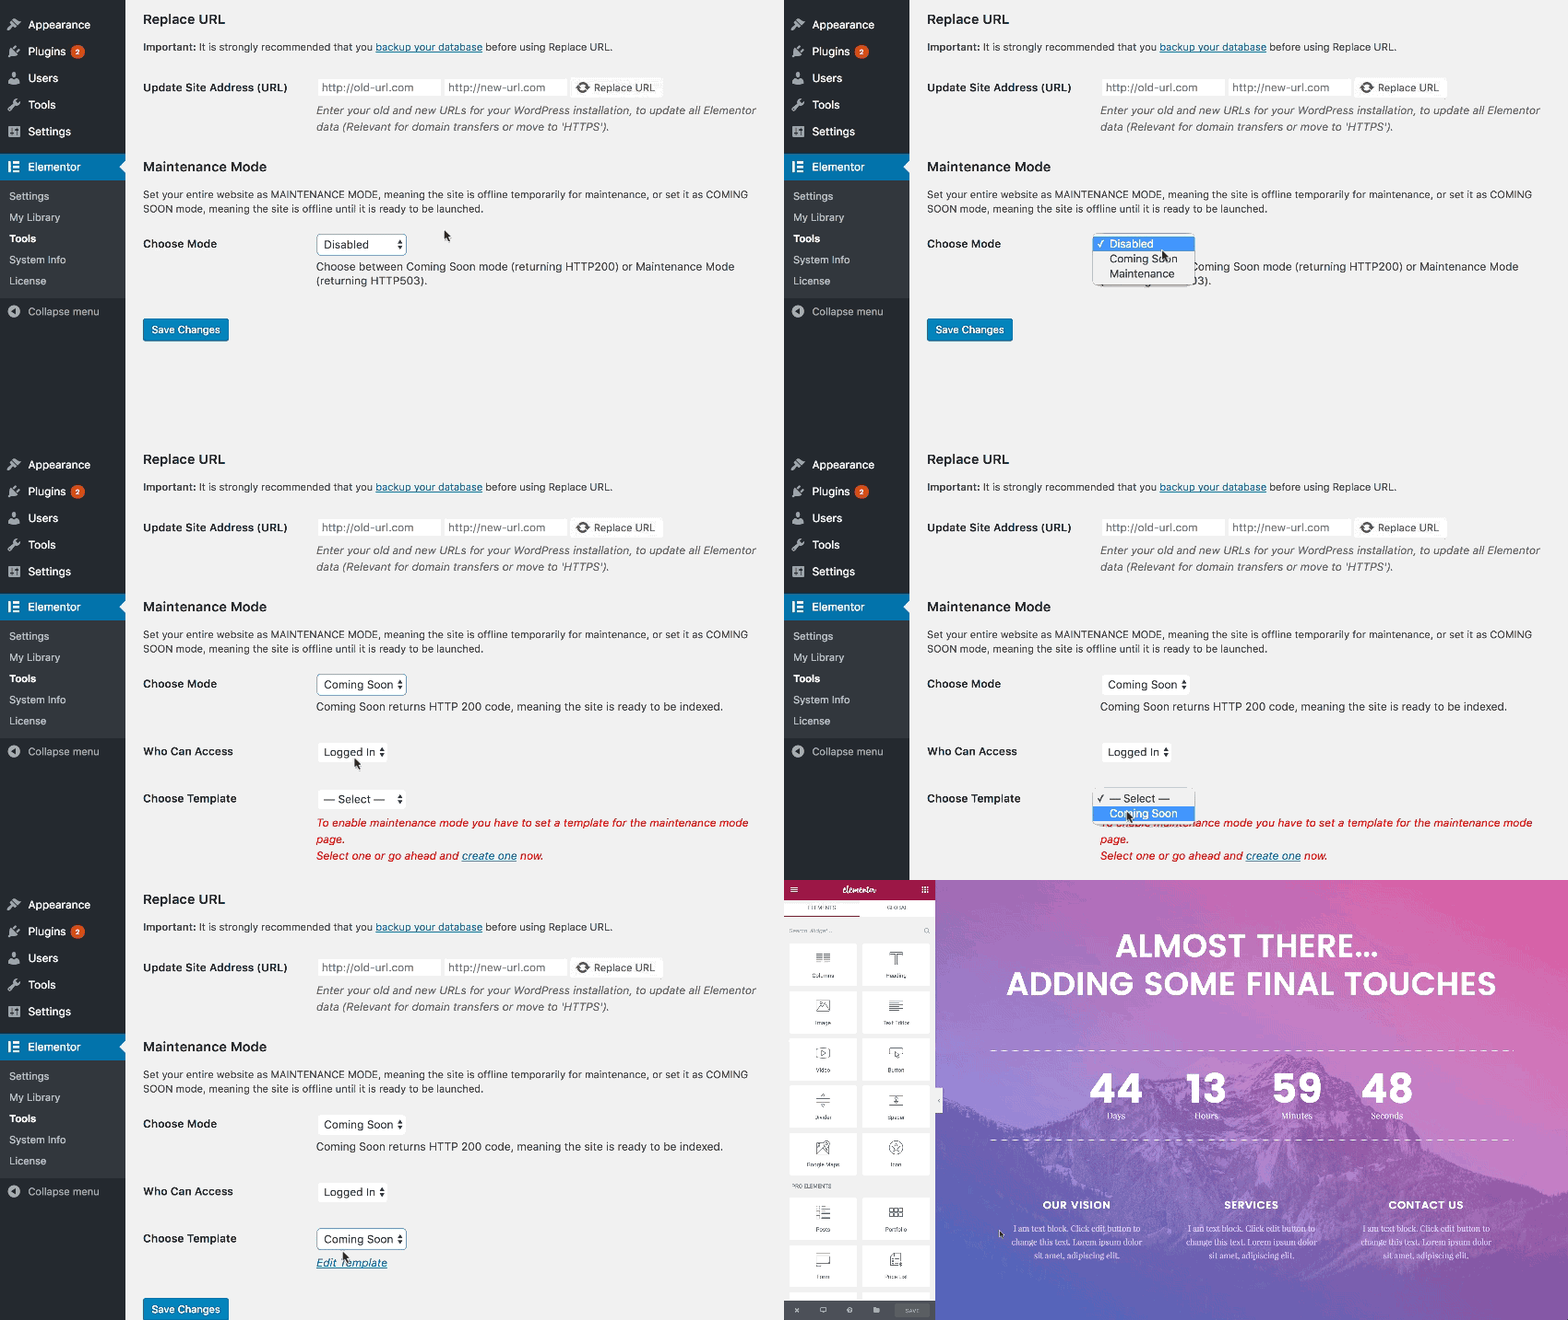
Credit: elementor.com
Conclusion
Putting your WordPress site in maintenance mode is easy. You can use a plugin or add code. This keeps your site safe while you make changes. Follow our guide to do it right.
Faqs
| Question | Answer |
|---|---|
| What is maintenance mode? | A state where your site shows a maintenance message to visitors. |
| Why use maintenance mode? | To update, fix, or test your site without affecting users. |
| Can I customize the maintenance page? | Yes, you can customize it using plugins or code. |


