To enable Elementor Tabs Hover Switch, use custom CSS code to trigger tab switching on hover. This enhances user experience.
Elementor Tabs Hover Switch allows users to switch between tabs by hovering over them, rather than clicking. This feature improves user interaction and makes navigation smoother. Custom CSS is essential for implementing this feature in Elementor. Users enjoy a more intuitive browsing experience, reducing the need for multiple clicks.
By incorporating this functionality, websites can enhance their design and usability. SEO benefits also arise from improved user engagement and lower bounce rates. Implementing hover switch can set your site apart, making it more appealing to visitors. This small tweak can significantly impact user satisfaction and site performance.
Introduction To Elementor Tabs

Elementor Tabs Hover Switch is a powerful feature that adds a dynamic touch to your web pages. It allows users to switch between different tab contents just by hovering over the tab titles. This feature not only enhances user experience but also makes navigation more intuitive. Let’s dive into the basics with an introduction to Elementor Tabs.
What Are Elementor Tabs?
Elementor Tabs are interactive elements that help organize content into multiple sections. Each tab contains unique information, and users can switch between them to find what they need. These tabs are perfect for websites with a lot of content because they help keep the page clean and uncluttered.
Here are some key features of Elementor Tabs:
- Multiple Tab Options: Create as many tabs as needed.
- Customizable Design: Change colors, fonts, and styles to match your brand.
- Responsive Layout: Tabs adjust automatically on different devices.
Let’s see how these tabs can be used:
| Use Case | Description |
|---|---|
| FAQ Sections | Display frequently asked questions in an organized manner. |
| Product Features | Showcase different features of a product in separate tabs. |
| Service Details | Provide detailed descriptions of various services offered. |
Benefits Of Using Tabs
Using Elementor Tabs offers several benefits for both website owners and visitors. These benefits can significantly improve the overall user experience.
Here are some of the key benefits:
- Enhanced User Experience: Users can quickly find the information they need without scrolling.
- Improved Navigation: Tabs make it easier to navigate through different sections.
- Content Organization: Tabs help organize content efficiently, keeping the page clean.
These are some additional advantages:
- SEO Friendly: Well-organized content can improve your search engine rankings.
- Time-Saving: Users spend less time looking for information, increasing engagement.
- Professional Look: Tabs give your website a more polished and professional appearance.
Elementor Tabs not only make your website look good but also make it function better. It’s a small change that can make a big difference.
Setting Up Elementor Tabs
Elementor Tabs Hover Switch is a powerful feature that brings interactivity to your website. Setting up Elementor Tabs can enhance user experience by organizing content in a neat, clickable format. Visitors can simply hover over tabs to switch between different sections without clicking. This functionality adds a modern touch to your site, making it more dynamic and user-friendly.
Creating Your First Tab
Creating your first tab in Elementor is simple and quick. Follow these steps to get started:
- Open Elementor: Navigate to the page where you want to add the tabs and click ‘Edit with Elementor’.
- Add the Tabs Widget: In the Elementor panel, search for the ‘Tabs’ widget and drag it to your desired section.
- Configure Tab Titles: Click on the ‘Tab 1’ and ‘Tab 2’ titles to rename them according to your content needs.
- Insert Content: Add content to each tab by clicking on the respective tab pane and entering text, images, or other elements.
Here’s a quick summary table to help you:
| Step | Action |
|---|---|
| 1 | Open Elementor and edit the page. |
| 2 | Add the Tabs Widget to the section. |
| 3 | Rename Tab Titles as needed. |
| 4 | Insert content into each tab. |
Following these steps ensures that your tabs are set up correctly. Ensure each tab contains relevant and engaging content to keep visitors interested.
Customizing Tab Settings
Customizing tab settings allows you to make your tabs visually appealing and functional. Here’s how to do it:
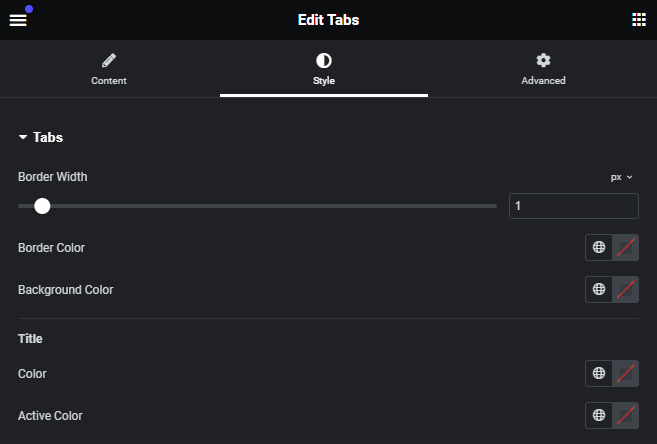
- Style Tab: Click on the ‘Style’ tab in the Elementor panel to adjust the appearance of your tabs. You can change colors, fonts, and spacing.
- Advanced Settings: Under the ‘Advanced’ tab, you can add custom CSS, control margins, and set animations for your tabs.
- Hover Effects: Use the ‘Hover’ settings to make your tabs switch on hover. This feature enhances user interaction by allowing tabs to change without clicks.
Here are some key settings you can customize:
| Setting | Description |
|---|---|
| Color | Change the background and text color of your tabs. |
| Typography | Adjust font size, style, and family. |
| Spacing | Set padding and margin to ensure tabs are well-placed. |
| Custom CSS | Insert custom CSS for advanced styling. |
| Hover Animation | Enable hover effects to switch tabs smoothly. |
Customizing these settings ensures your tabs align with your website’s design and functionality. Experiment with different styles to create an engaging user experience.
Hover Effects In Elementor
Credit: www.codeopen.io
Elementor Tabs Hover Switch adds a dynamic touch to your website. Hover Effects in Elementor make your site more interactive and engaging. These effects grab users’ attention and enhance the overall user experience. By mastering hover effects, you can create visually appealing and responsive websites.
Types Of Hover Effects
Elementor provides various hover effects to make your tabs stand out. Here are some popular types:
- Color Change: Change the background or text color on hover.
- Opacity: Adjust the opacity to make elements fade in or out.
- Transform: Use CSS transform properties like scale, rotate, and translate.
- Shadow: Add or modify shadows to create depth.
- Border: Change border color, style, or width on hover.
These effects can be combined to create unique interactions. For example, you can combine color change and opacity for a smooth transition effect.
| Effect | Description |
|---|---|
| Color Change | Changes the color of the element or its text. |
| Opacity | Fades the element in or out. |
| Transform | Applies scaling, rotation, or translation. |
| Shadow | Adds or modifies shadows to create depth. |
| Border | Alters border color, style, or width. |
Applying Hover Effects To Tabs
Applying hover effects to tabs in Elementor is straightforward. Follow these steps:
- Open the Elementor editor.
- Select the tab widget you want to edit.
- Go to the Advanced tab in the panel.
- Open the Custom CSS section.
- Insert your CSS code for the hover effect. For example:
/ Change tab background color on hover /
.selector:hover {
    background-color: #f0f0f0;
}

/ Scale up tab on hover /
.selector:hover {
    transform: scale(1.1);
}
Using these simple steps, you can easily add hover effects to your tabs. This makes your website more interactive and engaging. Remember to preview your changes and adjust as needed.

Credit: www.youtube.com
Switching Tabs On Hover
Elementor Tabs Hover Switch is a dynamic feature that enhances user experience. With this, tabs change automatically when a user hovers over them. This feature can make your website more interactive and engaging. Switching tabs on hover eliminates the need for clicks, making navigation smoother and faster.
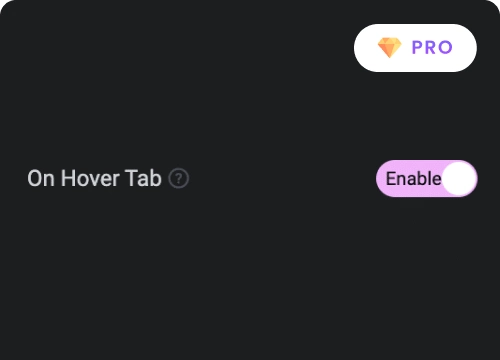
Configuring Hover Switch
To configure the Hover Switch in Elementor, follow these simple steps. First, open your Elementor editor and select the Tabs widget. Navigate to the Advanced settings section. Here, you will find the Hover Switch option.
Enable the Hover Switch feature by toggling the switch to the ON position. You can further customize the delay time for the hover effect. This delay can be set in milliseconds.
Here is a quick guide for reference:
| Step | Description |
|---|---|
| 1 | Open Elementor Editor |
| 2 | Select Tabs Widget |
| 3 | Go to Advanced Settings |
| 4 | Enable Hover Switch |
| 5 | Set Delay Time |
Remember: Save your settings and preview your changes to ensure everything works perfectly.
Best Practices For Hover Switching
Adopting best practices for hover switching can maximize its effectiveness. Here are some tips to consider:
- Delay Time: Set an appropriate delay time. A delay of 200-300 milliseconds is often ideal. It prevents accidental switching.
- Clear Labels: Ensure your tabs have clear and concise labels. This helps users understand the content they are hovering over.
- Consistent Design: Maintain a consistent design for all tabs. Uniformity enhances the user experience and makes navigation intuitive.
Testing: Always test the hover switch feature on different devices and browsers. Ensure it performs well across all platforms.
Content Optimization: Optimize the content within each tab. This keeps your users engaged and encourages them to explore more.
Accessibility: Make sure that the hover switch is accessible. Users with disabilities should also be able to navigate through the tabs effortlessly.
Following these best practices ensures a seamless and enjoyable user experience. These tips can help you leverage the full potential of the Elementor Tabs Hover Switch feature.
Styling Your Tabs
Elementor Tabs Hover Switch is an exciting feature that enhances user experience by switching tabs on hover. The key to making your tabs stand out is through effective styling. With Elementor, you have endless possibilities to style your tabs, ensuring they are visually appealing and user-friendly. Let’s dive into some essential styling aspects.
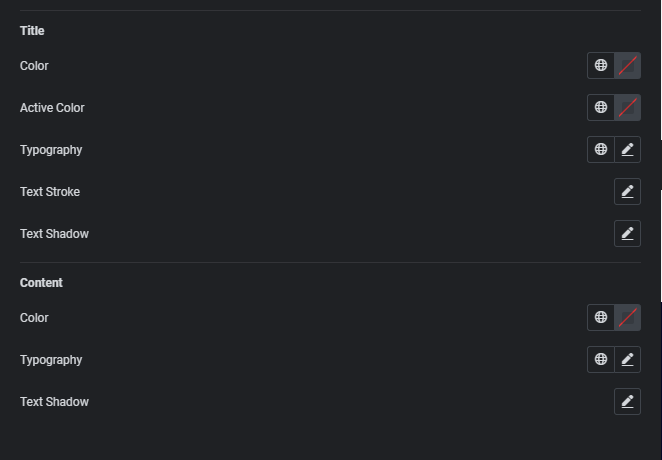
Color And Font Customization
Color and font customization play a crucial role in making your tabs attractive and readable. With Elementor, you can easily adjust these settings to match your website’s theme.
Color Customization:
- Background Color: Choose a background color that contrasts well with your text. This ensures readability.
- Text Color: Ensure the text color is readable against the background. Use dark text on light backgrounds and vice versa.
- Hover Color: Set a distinct hover color to indicate an active tab. This enhances user interaction.
Font Customization:
- Font Family: Select a font that matches your website’s overall typography. This keeps the design consistent.
- Font Size: Ensure the font size is legible on all devices. A size of 16px is generally recommended.
- Font Weight: Use different font weights to emphasize important tabs. Bolder fonts can highlight active or important tabs.
Responsive Design Considerations
Responsive design ensures your tabs look good on all devices. Elementor provides tools to make your tabs responsive.
Viewport Settings:
- Desktop: Optimize your tabs for larger screens by using ample padding and spacing. This ensures each tab is easily clickable.
- Tablet: Adjust the tab size and font to fit smaller screens. Ensure the tabs do not overlap or look crowded.
- Mobile: Use vertical stacking for tabs on mobile devices. This ensures easy navigation without horizontal scrolling.
Testing Responsiveness:
- Preview Mode: Use Elementor’s preview mode to test how tabs look on different devices.
- Adjust as Needed: Make real-time adjustments in the Elementor editor to ensure a seamless experience across all devices.
With these responsive design considerations, you can create tabs that offer a great user experience on any device.
Advanced Customization
Elementor Tabs Hover Switch offers a dynamic way to create interactive tabs on your website. With advanced customization options, you can make these tabs not only functional but also visually appealing. Let’s explore two powerful methods to enhance your Elementor Tabs Hover Switch using custom CSS and JavaScript.
Using Css For Custom Effects
Customizing your Elementor Tabs Hover Switch with CSS allows you to create unique visual effects. By adding a few lines of CSS code, you can change the tab’s appearance on hover, making it more engaging for users.
Here are some simple CSS tricks:
- Change Tab Color on Hover: You can change the background color of tabs when hovered over. This helps in highlighting the active tab.
- Modify Tab Borders: Adjusting the borders of tabs can make them stand out. You can use different styles like dashed, dotted, or solid borders.
- Apply Shadows: Adding shadow effects to tabs can give them a 3D look, making them more appealing.
Below is an example of CSS code that changes the background color and adds a shadow effect:
/ CSS for changing tab background color on hover /
.elementor-tab-title:hover {
    background-color: #f0f0f0;
    box-shadow: 2px 2px 5px rgba(0, 0, 0, 0.2);
}
Custom CSS gives you flexibility. You can tailor the tabs to match your website’s theme and style.
Integrating Javascript For Interactivity
JavaScript adds a layer of interactivity to your Elementor Tabs Hover Switch. By incorporating JavaScript, you can create animations and dynamic content changes, making the tabs more interactive.
Here are some ways to use JavaScript:
- Animate Tab Content: You can create smooth transitions between tab contents, enhancing user experience.
- Dynamic Content Loading: Load content dynamically when a tab is hovered over, reducing initial load time.
- Custom Event Handling: Trigger specific actions when a tab is hovered over, such as displaying tooltips or additional information.
Below is an example of JavaScript code that animates the tab content on hover:
/ JavaScript for animating tab content on hover /
document.querySelectorAll('.elementor-tab-title').forEach(tab => {
    tab.addEventListener('mouseover', function() {
        let content = document.querySelector(this.getAttribute('href'));
        content.style.transition = 'opacity 0.5s';
        content.style.opacity = '1';
    });

    tab.addEventListener('mouseout', function() {
        let content = document.querySelector(this.getAttribute('href'));
        content.style.transition = 'opacity 0.5s';
        content.style.opacity = '0';
    });
});
Integrating JavaScript allows you to create a more dynamic and engaging user interface. It opens up a world of possibilities for enhancing user interactions.
Common Issues And Fixes
Elementor Tabs Hover Switch is a fantastic feature for creating interactive and engaging tabs. Users often face common issues that require simple fixes. This guide provides solutions to ensure a seamless experience with Elementor Tabs Hover Switch.
Troubleshooting Hover Effects
Hover effects add dynamism to your tabs, but they can sometimes cause issues. Here are common problems and their fixes:
- Hover Effect Not Working: Ensure you have enabled hover effects in the settings. Navigate to the tab widget, then go to the Style section. Confirm that the hover effect is turned on.
- Delayed Response: If the hover effect is slow, check your site’s performance. Optimize images and use caching plugins to speed up the site.
- Compatibility Issues: Some themes or plugins may conflict with the hover effect. Disable other plugins one by one to identify the conflict. Update your theme and Elementor to the latest versions.
| Issue | Possible Cause | Solution |
|---|---|---|
| Hover effect not appearing | Hover effect not enabled | Enable the hover effect in the Style section |
| Slow hover effect | Site performance issues | Optimize site speed and use caching |
| Hover effect conflict | Theme or plugin conflict | Disable conflicting plugins |
Resolving Tab Display Problems
Display problems with Elementor tabs can disrupt user experience. Here are solutions to common display issues:
- Tabs Not Showing: Check if the tabs are hidden due to CSS. Inspect the element and look for display: none;. Remove or modify the CSS rule.
- Content Overlapping: Overlapping content occurs due to improper settings. Adjust padding and margins in the Advanced section of the tab widget.
- Responsive Design Issues: Tabs may not display correctly on mobile devices. Use Elementor’s responsive mode to adjust the layout for different screen sizes.
- Inspect the tab element using browser developer tools.
- Look for CSS rules that might hide the tabs.
- Adjust padding and margins to prevent overlapping.
- Use responsive mode in Elementor to fix mobile display issues.
| Problem | Cause | Solution |
|---|---|---|
| Tabs not displaying | Hidden by CSS | Remove display: none; CSS rule |
| Content overlapping | Improper padding/margin | Adjust padding and margins |
| Responsive issues | Layout not optimized for mobile | Use responsive mode in Elementor |

Examples And Inspiration
Elementor Tabs Hover Switch brings a new level of interactivity to your website. By using this feature, you can create dynamic, user-friendly tabs that switch content on hover. This can significantly improve user engagement and enhance the overall user experience. Below are some inspiring examples and creative designs to help you get the most out of this feature.
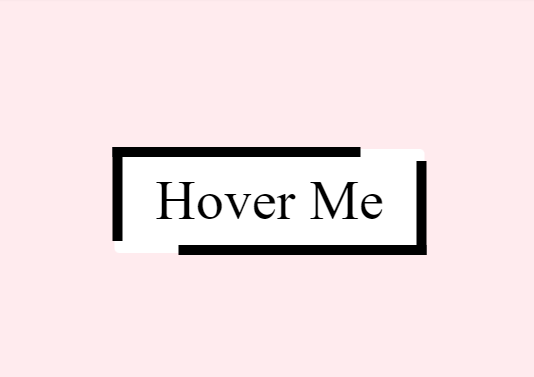
Creative Tab Designs
Creating visually appealing tabs can make your website stand out. Unique designs can catch the user’s eye and keep them engaged. Here are some creative ideas:
- Gradient Backgrounds: Use gradient backgrounds that change color on hover to add a touch of elegance.
- Icon Integration: Incorporate icons into your tabs to make them more intuitive and visually appealing.
- Animated Transitions: Implement smooth animations that trigger on hover to make the switch seamless and engaging.
- Custom Fonts: Use distinctive fonts that match your brand’s personality.
- Hover Effects: Apply subtle hover effects like shadow or scale to give a dynamic feel.
For example, you can use the following CSS code to add a hover effect:
.tab:hover {
    background-color: #f0f0f0;
    transition: background-color 0.3s ease;
}
These design elements can make your tabs not only functional but also visually appealing. Here is a table summarizing some creative tab design tips:
| Design Element | Description |
|---|---|
| Gradient Backgrounds | Use gradient colors that change on hover |
| Icon Integration | Incorporate icons for better visual appeal |
| Animated Transitions | Add smooth animations on hover |
| Custom Fonts | Use fonts that match your brand |
| Hover Effects | Apply subtle effects like shadow or scale |
Showcase Of Tab Implementations
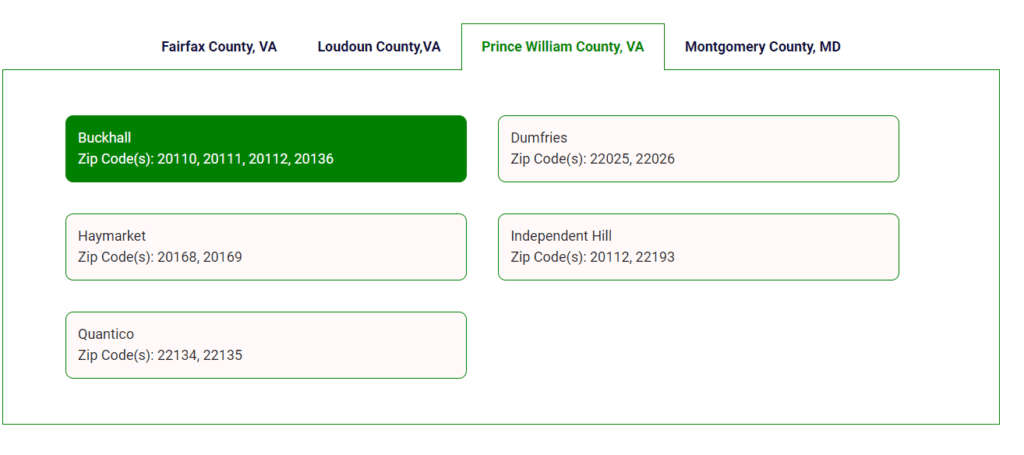
Seeing real-world examples can inspire you to create your own unique tab designs. Below are some standout implementations using Elementor Tabs Hover Switch:
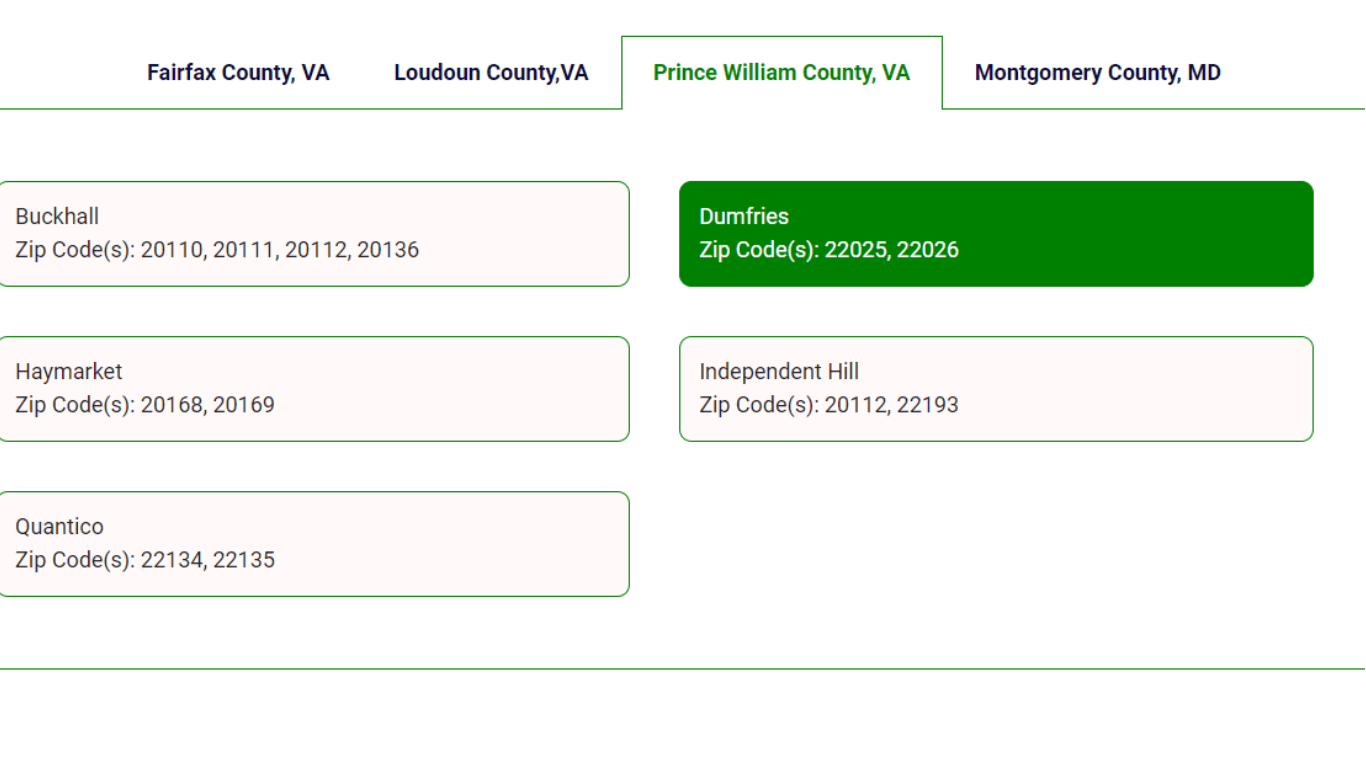
- Portfolio Showcase: A creative agency website uses tabs to showcase their portfolio. Each tab displays a different project with a hover effect that highlights the project details.
- Product Features: An e-commerce site uses tabs to list product features. Hovering over each tab reveals detailed descriptions, enhancing the shopping experience.
- Service Listings: A consulting firm uses tabs to present their services. Each tab provides a brief overview, and hovering switches to a detailed explanation.
- FAQ Sections: A tech support page uses tabs for frequently asked questions. Hovering over a question tab reveals the answer, making it easy for users to find information.
- Team Member Profiles: A corporate website uses tabs for team member profiles. Hovering over each tab shows the member’s bio and contact info.
These examples show how versatile and effective Elementor Tabs Hover Switch can be. Each implementation enhances user interaction and provides a better user experience. Here is a table summarizing these implementations:
| Implementation | Description |
|---|---|
| Portfolio Showcase | Creative agency uses tabs to display projects |
| Product Features | E-commerce site lists features with detailed descriptions |
| Service Listings | Consulting firm presents services with detailed explanations |
| FAQ Sections | Tech support page uses tabs for FAQs |
| Team Member Profiles | Corporate site shows team bios and contact info |
Credit: theplusaddons.com
Conclusion
Switching tabs on hover with Elementor can elevate your website’s user experience. This feature ensures seamless navigation and keeps visitors engaged. Implementing it is straightforward and offers significant usability benefits. Try it today and see how it transforms your site’s interactivity and overall appeal.
Happy designing!