For the best WP Rocket settings for Elementor, enable caching, minify CSS, and delay JavaScript execution. Also, optimize images for faster loading.
WP Rocket is a powerful caching plugin that enhances website performance. When paired with Elementor, it provides a seamless user experience. Proper configuration ensures faster page load times and improved SEO rankings. Start by enabling caching and minifying CSS files.
These settings reduce server load and speed up content delivery. Delaying JavaScript execution further optimizes performance, allowing the main content to load first. Image optimization is crucial for maintaining fast load times and enhancing user experience. With these adjustments, your Elementor-based site will run smoothly and efficiently, offering visitors a quick and engaging experience.
Initial Setup
Setting up WP Rocket for your Elementor site is essential. This step ensures optimal performance. Follow this guide to configure your settings correctly.
Installing Wp Rocket
First, you need to install the WP Rocket plugin. Follow these steps:
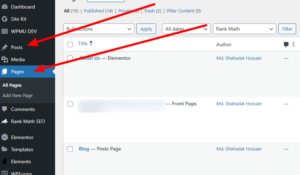
- Log in to your WordPress dashboard.
- Navigate to Plugins > Add New.
- Search for WP Rocket.
- Click Install Now.
- Wait for the installation to complete.
Activating The Plugin
After installation, you need to activate the plugin:
- Go to Plugins > Installed Plugins.
- Find WP Rocket in the list.
- Click Activate.
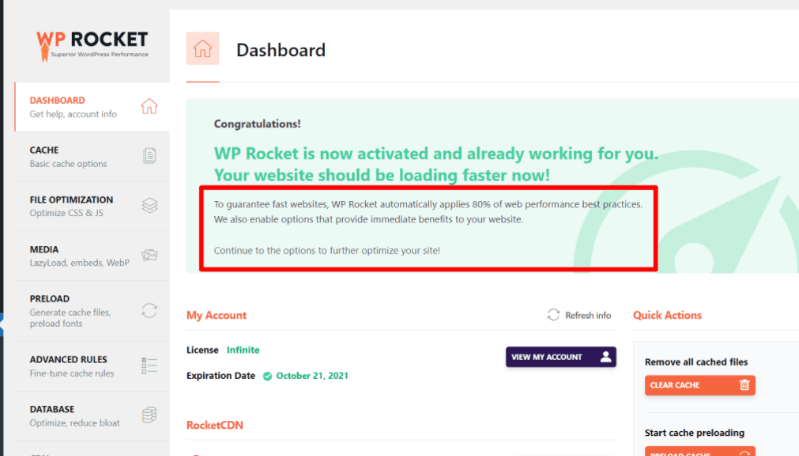
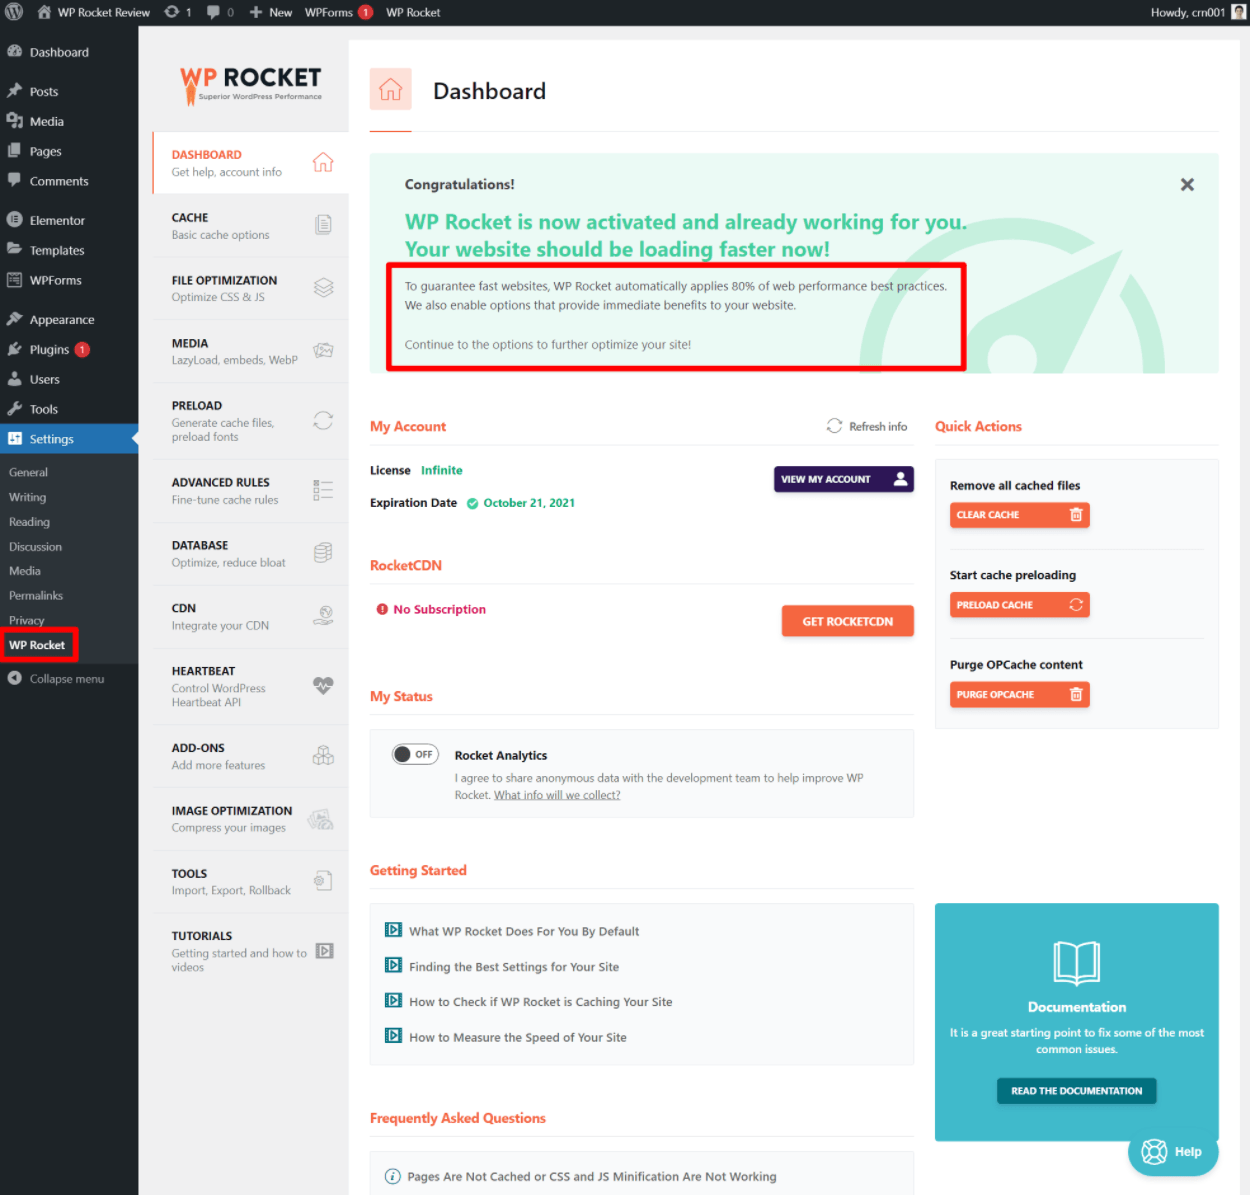
Once activated, you can access the settings:
- Navigate to Settings > WP Rocket.
- Begin configuring your settings.
Ensure you enable caching to speed up your Elementor site.
| Step | Description |
|---|---|
| Install | Download and install WP Rocket from the plugin directory. |
| Activate | Activate the plugin from the installed plugins page. |
| Settings | Access settings to start configuration. |
With WP Rocket installed and activated, you’re ready for the next steps.
Basic Settings
To optimize your Elementor site, you need the best WP Rocket settings. These settings enhance speed and performance. Let’s dive into the basic settings that can make a difference.
Cache Settings
Caching helps your site load faster. It stores copies of your pages for quick access. Here are the key settings:
- Enable Caching for Mobile Devices: Check this box to speed up mobile browsing.
- User Cache: Enable this if you have logged-in users. It helps them see cached content.
- Cache Lifespan: Set this to 10 hours. It refreshes the cache regularly.
Proper cache settings can reduce load times significantly.
File Optimization
File optimization reduces the size of your files. This improves load times. Below are the important settings:
- Minify HTML: This removes unnecessary characters from your HTML.
- Minify CSS: This reduces CSS file sizes. Your styles will load faster.
- Minify JavaScript: This reduces JavaScript file sizes. Your scripts will execute quicker.
Minifying files can speed up your website.
Next, enable Combine Google Fonts. This reduces the number of requests to the server. Also, enable Remove Query Strings from Static Resources. This helps with caching static files.
These settings streamline file delivery.
Media Optimization
Media optimization is key for a fast-loading Elementor site. WP Rocket offers settings to improve your media files. This section covers the best WP Rocket settings for media optimization.
Lazy Loading
Lazy loading delays the loading of images until users scroll to them. This reduces initial load time. WP Rocket makes lazy loading easy to enable.
- Go to the WP Rocket dashboard.
- Select the Media tab.
- Check the box for Enable for images.
- Check the box for Enable for iframes and videos.
Lazy loading helps your Elementor site load faster. Users will experience smoother browsing.
Image Compression
Image compression reduces the file size of images without losing quality. Smaller images load faster. WP Rocket does not compress images directly but works well with plugins that do.
- Install an image compression plugin like Imagify or Smush.
- Configure the plugin to compress images on upload.
- Optimize existing images using the plugin’s bulk optimization feature.
Compressed images save bandwidth and reduce load times. Your Elementor site will be faster and more efficient.
Combining lazy loading and image compression gives your Elementor site a speed boost. These WP Rocket settings ensure a better user experience.

Credit: alphaefficiency.com
Preloading
Preloading helps your website load faster. It ensures key resources are ready before the user needs them. For Elementor users, WP Rocket offers great preloading options. These features can boost your site’s performance significantly. Below are the best WP Rocket settings for preloading.
Sitemap Preloading
Sitemap preloading is a powerful feature. It preloads all the pages listed in your sitemap. This ensures visitors get a fast-loading page on their first visit. To enable this:
- Go to WP Rocket settings.
- Find the Sitemap Preloading option.
- Check the box to enable it.
- Enter your sitemap URL.
WP Rocket will now preload pages based on your sitemap. This helps improve your site’s load speed.
Dns Prefetching
DNS prefetching helps reduce the time it takes to connect to external domains. This is crucial for Elementor users with many external resources. To set up DNS prefetching:
- Go to WP Rocket settings.
- Find the DNS Prefetching option.
- Enter the URLs of external domains you use.
Here is a sample list:
https://fonts.googleapis.comhttps://cdnjs.cloudflare.comhttps://ajax.googleapis.com
This setting helps your browser connect faster to these external resources. It results in a faster page load time.
Advanced Settings
Unlock the full potential of WP Rocket with its advanced settings. These settings ensure your Elementor-based website runs smoothly and efficiently. Let’s dive into two crucial aspects: Database Optimization and Heartbeat Control.
Database Optimization
Regular database optimization keeps your site fast. WP Rocket’s Database Optimization feature helps you clean and optimize your database effortlessly.
- Revisions: Remove old revisions of posts and pages.
- Drafts: Delete unused drafts to free up space.
- Trashed: Empty the trash to remove unnecessary data.
- Spam: Clear spam comments to reduce database size.
- Expired Transients: Delete expired transients for better performance.
Regular cleanup ensures your database stays lean. This leads to faster load times and better user experience.
Heartbeat Control
WP Rocket’s Heartbeat Control feature manages the WordPress Heartbeat API. This reduces unnecessary server requests and improves site performance.
| Setting | Description |
|---|---|
| Reduce Activity | Lower the frequency of Heartbeat API requests. |
| Disable Heartbeat | Turn off Heartbeat API on specific pages. |
Reducing Heartbeat API activity saves server resources. This makes your Elementor site faster and more responsive.
By optimizing your database and controlling the Heartbeat API, you ensure a smooth user experience. These advanced settings in WP Rocket are essential for any Elementor-powered website.
Credit: www.wpkube.com
Compatibility With Elementor
WP Rocket is a popular caching plugin for WordPress. It works well with Elementor. This ensures your website loads quickly. Elementor is a powerful page builder. It helps you create stunning websites. Proper settings in WP Rocket can enhance this experience.
Excluding Critical Css
Critical CSS is essential for your site’s layout. WP Rocket generates it to improve speed. But, some CSS might conflict with Elementor. Excluding this critical CSS can help.
- Go to WP Rocket settings.
- Select the “File Optimization” tab.
- Find the “Optimize CSS Delivery” section.
- Uncheck the box for “Remove Unused CSS”.
Ensure your Elementor pages load without issues. This step is crucial for smooth performance.
Handling Javascript
JavaScript is vital for interactive elements. WP Rocket can optimize JavaScript files. But, improper settings can break your Elementor pages. Follow these steps to handle JavaScript:
- Navigate to WP Rocket settings.
- Click on the “File Optimization” tab.
- Locate the “JavaScript Files” section.
- Enable “Minify JavaScript Files”.
- Enable “Combine JavaScript Files”.
- Disable “Load JavaScript Deferred”.
These settings ensure your JavaScript runs smoothly. Your Elementor designs remain intact.
Performance Testing
Performance testing is essential for optimizing your WordPress site. It helps ensure that users have a fast and smooth experience. WP Rocket and Elementor are popular tools for building and speeding up your site. This section explains how to test performance effectively.
Using Gtmetrix
GTmetrix is a powerful tool for performance testing. It provides detailed reports on your site’s speed. Follow these steps:
- Go to GTmetrix.
- Enter your website URL.
- Click “Analyze”.
- Wait for the report to generate.
GTmetrix will analyze your site and give you a performance score. It also highlights areas for improvement.
Analyzing Results
Once you have your GTmetrix report, focus on key metrics. These include:
- Page Load Time
- Total Page Size
- Requests
Check the Page Load Time. Aim for under 3 seconds. A lower time improves user experience. Next, look at the Total Page Size. Smaller sizes load faster. Finally, review the Requests. Fewer requests mean quicker loading.
GTmetrix also provides recommendations. These are specific actions you can take. For example:
| Recommendation | Action |
|---|---|
| Optimize Images | Compress and resize images |
| Minimize CSS | Reduce and combine CSS files |
| Leverage Browser Caching | Use caching plugins like WP Rocket |
By following these steps, you can optimize your Elementor site. Use WP Rocket settings to make these improvements easily.
Credit: www.youtube.com
Frequently Asked Questions
What Are The Best Wp Rocket Settings For Elementor?
To optimize Elementor with WP Rocket, enable caching for mobile devices and user cache. Enable minification for CSS, JavaScript, and HTML. Use LazyLoad for images. Preload critical assets and use the database optimization features. These settings improve performance and loading times.
How Do I Integrate Wp Rocket With Elementor?
Install and activate both plugins. Ensure WP Rocket settings are optimized for Elementor. Enable LazyLoad, file minification, and caching. Test your site’s performance. Adjust settings as needed for optimal results. This ensures compatibility and better performance.
Does Wp Rocket Improve Elementor Page Speed?
Yes, WP Rocket significantly boosts Elementor page speed. It optimizes CSS, JavaScript, and images. Enables caching and LazyLoad. Reduces server load and enhances user experience. These improvements make your Elementor site faster and more efficient.
Why Use Wp Rocket With Elementor?
WP Rocket enhances Elementor’s performance by optimizing resources. It speeds up loading times and improves SEO. Reduces bounce rates and enhances user experience. It’s user-friendly and compatible. This combination is powerful for creating fast, responsive sites.
Conclusion
Optimizing WP Rocket for Elementor boosts your site’s performance and user experience. Follow the settings we’ve outlined for best results. Regularly monitor and tweak to maintain speed. Enjoy a faster, more efficient website that keeps visitors engaged. Happy optimizing!