Publishing a WordPress site involves a few essential steps, from getting a domain name and hosting to making your website live for the public. Here’s a step-by-step guide for beginners to publish a WordPress site:
Step 1: Choose a Domain Name
Your domain name is your website’s address on the internet. It should be easy to remember. Choose a name that fits your website’s content. You can buy a domain name from various providers like GoDaddy or Namecheap.

Credit: wordpress.com
Step 2: Get Web Hosting
Web hosting stores your website files and makes them accessible online. Some popular web hosting providers are Bluehost, SiteGround, and HostGator. Choose a hosting plan that suits your needs.
Step 3: Install WordPress
Most web hosts offer one-click WordPress installation. Log in to your hosting account. Find the WordPress installation option. Click to install WordPress. Follow the instructions to complete the setup.
Step 4: Choose a Theme
WordPress has many free and paid themes. Themes change how your site looks. Go to your WordPress dashboard. Click on Appearance and then Themes. Browse and choose a theme you like. Click Install and then Activate.
Step 5: Customize Your Site
Make your site unique by customizing it. Go to the Customize option under Appearance. Here, you can change colors, fonts, and more. Add your logo and adjust the layout. Preview changes before saving them.
Step 6: Add Essential Plugins
Plugins add extra features to your site. Some essential plugins include:
- Yoast SEO: Helps with search engine optimization.
- Contact Form 7: Adds contact forms to your site.
- Akismet: Protects your site from spam.
- Jetpack: Offers security and performance features.
Go to the Plugins section in your dashboard. Click Add New. Search for the plugin you need. Click Install and then Activate.
Step 7: Create Essential Pages
Your site needs important pages like:
- Home: The main page visitors see.
- About: Information about you or your business.
- Contact: Ways for visitors to contact you.
- Blog: A section for your articles.
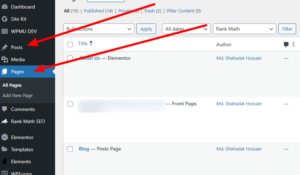
Go to Pages in your dashboard. Click Add New to create each page. Add content and images to make them interesting.
Step 8: Set Up Navigation Menu
A navigation menu helps visitors find their way around your site. Go to Appearance and then Menus. Create a new menu. Add the pages you created to the menu. Save your changes.
Step 9: Test Your Site
Before publishing, make sure everything works. Check all links and forms. Make sure your site looks good on mobile devices. Ask friends or family to test your site and give feedback.
Step 10: Publish Your Site
Now it’s time to go live! Go to your WordPress dashboard. Click on Settings and then Reading. Set your homepage and blog page. Save changes. Your site is now live on the internet!
FAQs: How to Publish a WordPress Site
1. What is a domain name, and why do I need one?
- Answer: A domain name is the unique address people use to access your website, like
www.example.com. You need one to make your website accessible to visitors.
2. How do I choose the right web hosting for my WordPress site?
- Answer: Look for hosting plans that offer good speed, reliability, security, and WordPress-specific features. Some popular options are Bluehost, SiteGround, and WP Engine.
3. Can I publish my WordPress site without buying a domain name?
- Answer: Yes, you can use a free subdomain provided by WordPress.com (e.g.,
yoursite.wordpress.com), but for a professional website, it’s better to buy your own domain.
4. What’s the difference between WordPress.com and WordPress.org?
- Answer: WordPress.com is a hosted platform where WordPress handles hosting, while WordPress.org is self-hosted, giving you more control but requiring you to find a web host.
5. How do I connect my domain to my WordPress site?
- Answer: Once you’ve registered a domain, you’ll need to point the domain’s DNS (Domain Name System) settings to your web hosting provider. Your host will provide the necessary nameservers.
6. How can I preview my WordPress site before going live?
- Answer: You can either use WordPress’s preview option in the admin area or set your site to “coming soon” mode using a plugin like SeedProd, allowing you to work behind the scenes before publishing.
7. How do I make my WordPress site live?
- Answer: After designing your site, go to the WordPress dashboard, set your site to “Public” in the settings, and ensure your domain is properly configured. Once done, your site will be live for visitors.
8. How do I optimize my WordPress site for search engines (SEO)?
- Answer: Install an SEO plugin like Yoast SEO or Rank Math, and ensure you use proper keywords, meta tags, and optimized images to help search engines index your site.
9. What should I do after publishing my WordPress site?
- Answer: After publishing, test your website’s functionality, make sure all links work, monitor its performance, and start promoting it through social media and SEO strategies.
10. Can I make changes to my site after it’s published?
- Answer: Yes, WordPress allows you to make updates and changes at any time, and those changes will be reflected instantly on your live site.
Conclusion
Publishing a WordPress site is easy with these steps. Choose a domain name and get web hosting. Install WordPress and choose a theme. Customize your site and add essential plugins. Create important pages and set up navigation. Test your site and publish it. Enjoy your new WordPress website!


