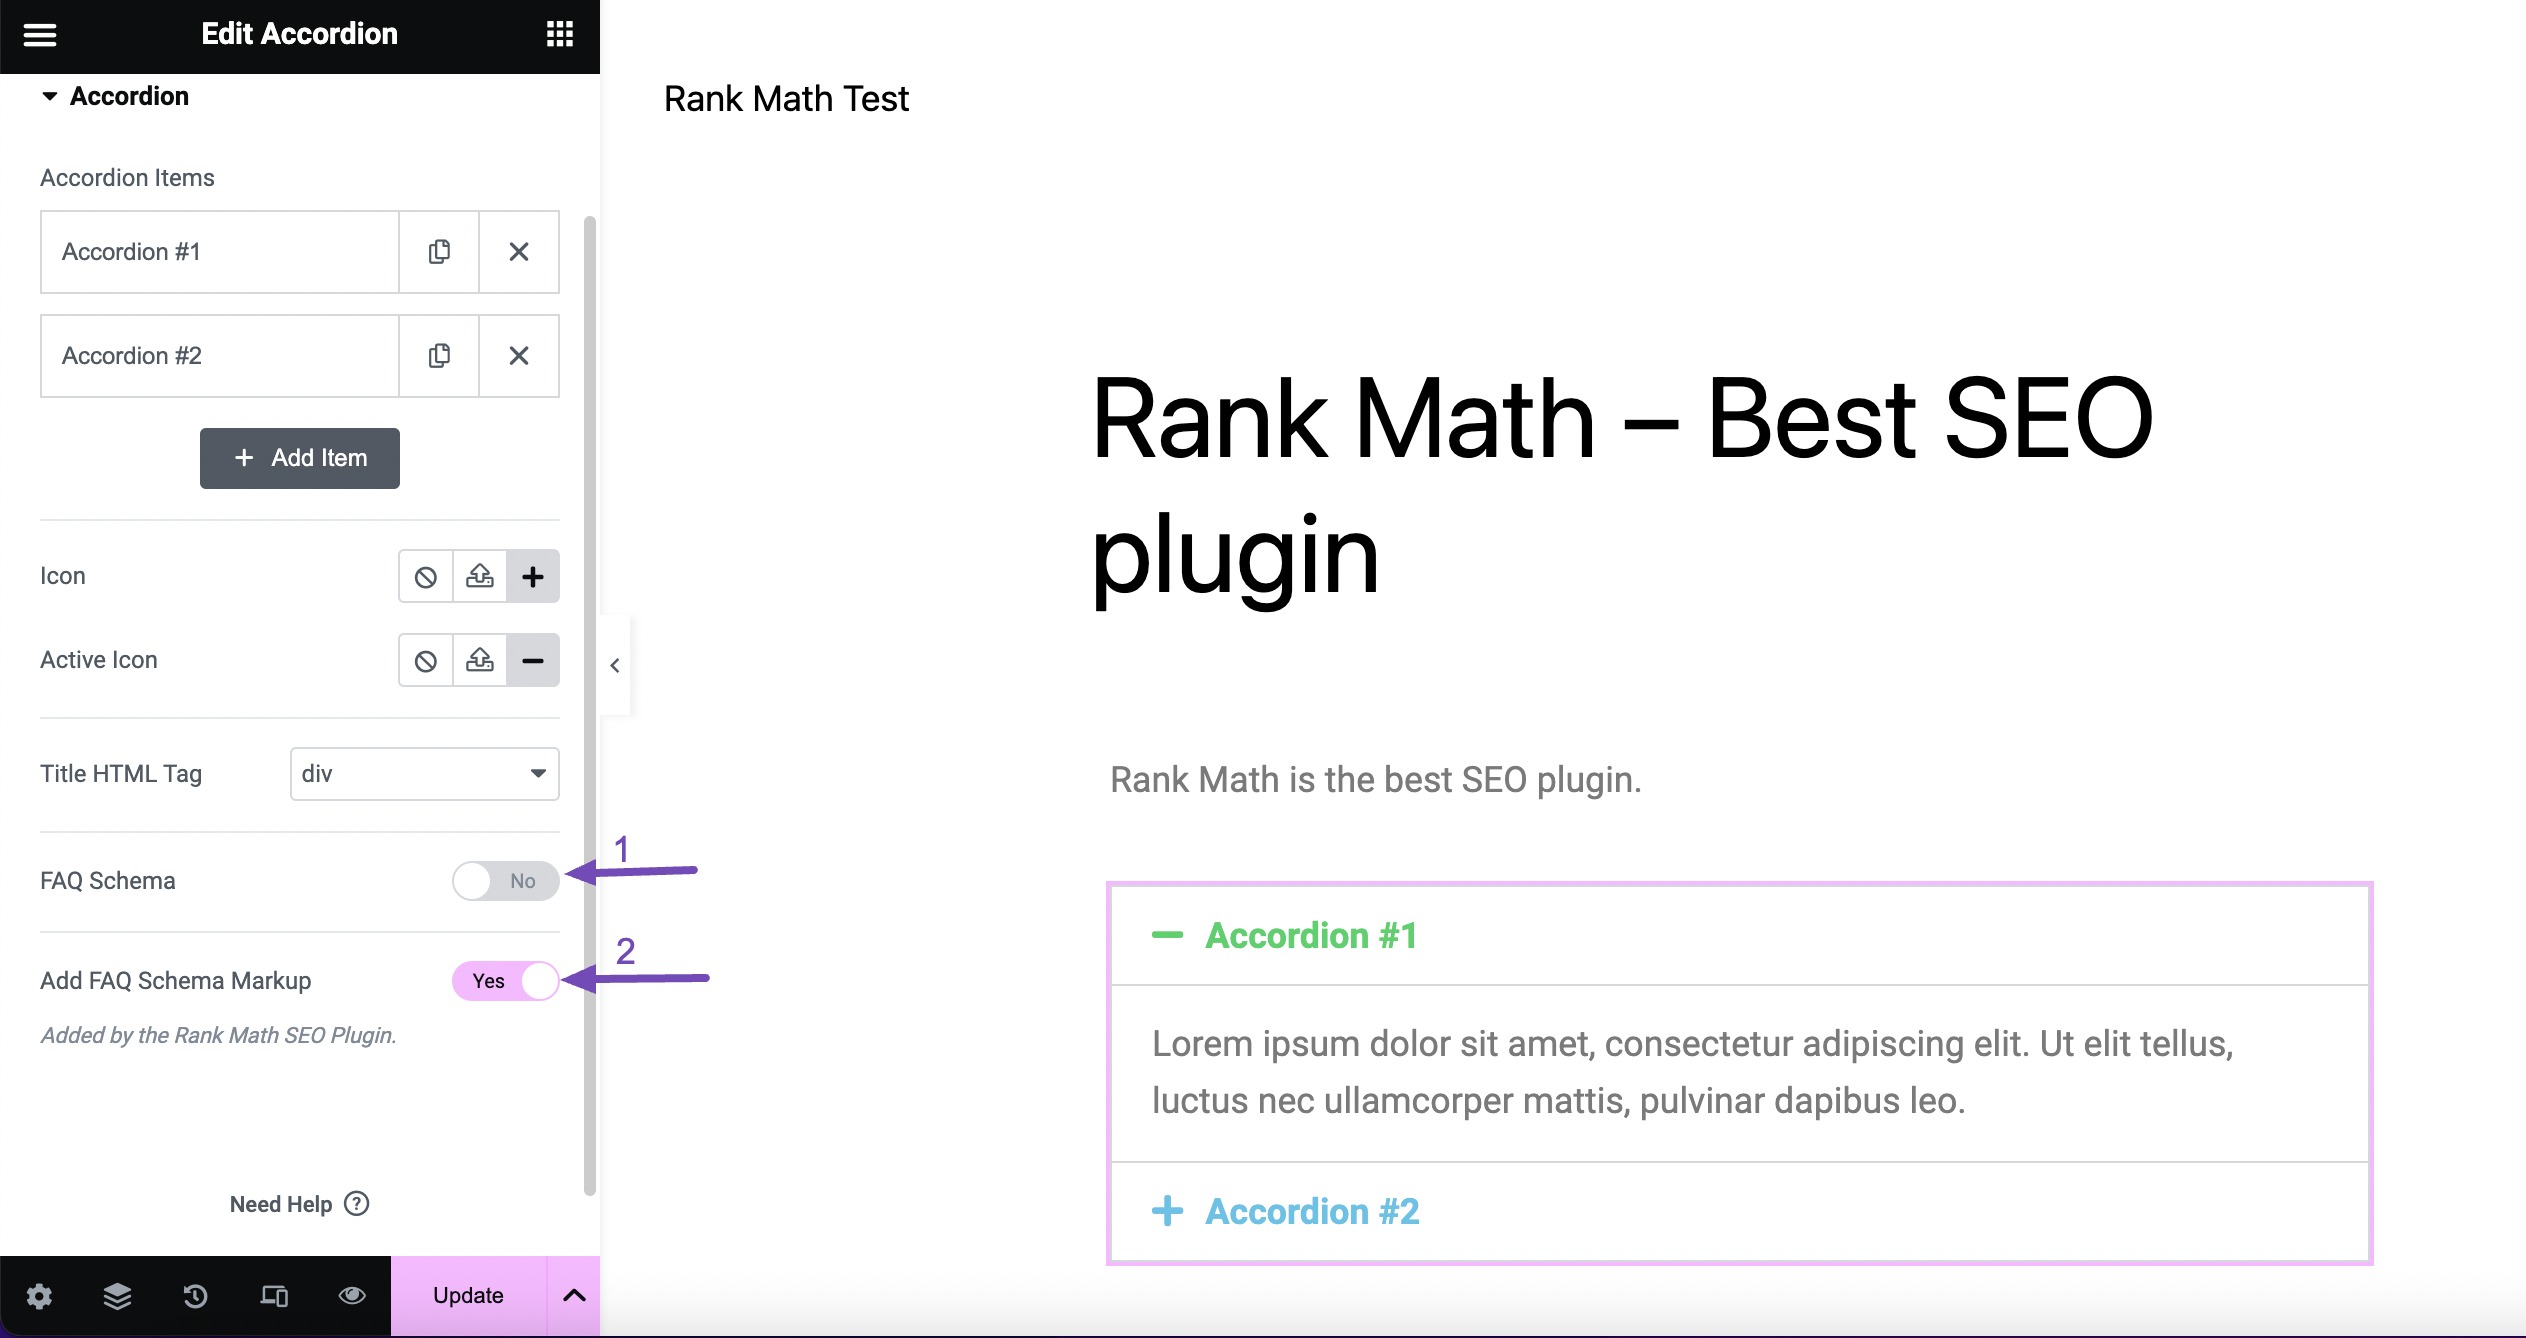
To add Schema Markup in Elementor, use the HTML widget and insert the relevant JSON-LD code. Customize the code for your specific content.
Schema Markup enhances your website’s visibility in search engines by providing structured data. This structured data helps search engines understand the content better, leading to improved SEO. Implementing Schema Markup in Elementor is straightforward. Use the HTML widget within Elementor to input your JSON-LD code.
This approach allows for precise customization of your structured data. By including Schema Markup, you can achieve richer search results, such as star ratings and event details. This not only boosts your site’s search appearance but also drives more organic traffic. Adding Schema Markup is a powerful way to optimize your Elementor-built website for search engines.

Credit: powerpackelements.com
Introduction To Schema Markup
Schema Markup is a powerful tool for your website. It helps search engines understand your content better. Schema Markup can boost your site’s visibility in search results. Adding Schema Markup in Elementor is simple.
Importance For Seo
Schema Markup is crucial for SEO. It helps search engines recognize the key details of your site. This enhances your content’s relevance in search results. Here are some reasons why Schema Markup is vital:
- Improves Search Engine Understanding: Makes your content clearer to search engines.
- Enhances Rich Snippets: Adds extra info like ratings and reviews.
- Boosts Click-Through Rates: Attractive snippets encourage more clicks.
How It Works
Schema Markup uses structured data. This data tells search engines what your content means. For example, it can define a product, article, or event. Here’s a simple example of how Schema Markup looks in code:
{
  "@context": "https://schema.org",
  "@type": "Person",
  "name": "John Doe",
  "jobTitle": "Software Engineer",
  "telephone": "(555) 555-5555",
  "email": "john.doe@example.com"
}
This code helps search engines understand that John Doe is a person with a job title, phone number, and email.
| Type | Description |
|---|---|
| Product | Information about a product. |
| Event | Details of an event. |
| Recipe | Ingredients and instructions for a recipe. |
Adding Schema Markup with Elementor involves a few steps. You need to use the HTML widget. Then, insert the Schema code into your page. This process helps search engines understand your content.
Getting Started With Elementor
Elementor is a powerful page builder for WordPress. It allows you to create stunning websites without coding. To add schema markup in Elementor, you first need to understand the basics. This section helps you get started with Elementor.
What Is Elementor?
Elementor is a drag-and-drop page builder for WordPress. It offers a visual editor to design web pages. You can create professional websites with ease. It is user-friendly and versatile. Beginners and experts both love using it.
Installing Elementor
Installing Elementor is simple. Follow these steps:
- Log in to your WordPress dashboard.
- Go to Plugins > Add New.
- Search for Elementor in the search bar.
- Click Install Now and then Activate.
Elementor is now installed and ready to use. You can start creating pages by clicking Edit with Elementor on any page or post.
Types Of Schema Markup
Schema Markup is essential for improving SEO and enhancing web search results. It helps search engines understand your content better. There are various types of Schema Markup you can add in Elementor. These types serve different purposes and can boost your website’s visibility.
Structured Data Types
Structured data types are diverse and serve different needs. Each type has a specific role in improving your site’s SEO.
- Article: Used for blog posts and news articles.
- Product: Highlights information about a product.
- Local Business: Provides details about a local business.
- Event: Displays information about upcoming events.
- Recipe: Perfect for food bloggers sharing recipes.
Common Use Cases
Different Schema Markups have varied applications. Below are some common use cases.
| Schema Type | Use Case |
|---|---|
| Article | Boosts blog and news article visibility. |
| Product | Enhances product listing pages. |
| Local Business | Improves local search results. |
| Event | Highlights event details in search results. |
| Recipe | Shows recipes with ingredients and cooking time. |
Adding Schema Markup is easy with Elementor. It helps you rank better and attract more visitors.

Credit: rankmath.com
Adding Schema Markup In Elementor
Schema Markup is crucial for SEO. It helps search engines understand your content. Adding Schema Markup in Elementor is simple. You can use HTML widgets or integrate JSON-LD code. Below are easy steps to do both.
Using Html Widgets
HTML widgets in Elementor allow you to add custom HTML code. Follow these steps to add Schema Markup:
- Open your Elementor editor.
- Drag and drop an HTML widget to the desired section.
- Insert your Schema Markup code inside the widget.
- Click Update to save changes.
Here’s an example of a simple Schema Markup:
John DoeSoftware DeveloperIntegrating Json-ld Code
JSON-LD is a popular format for adding Schema Markup. It’s easy to implement and manage. Here’s how to add JSON-LD code in Elementor:
- Open your Elementor editor.
- Drag and drop an HTML widget to the desired section.
- Insert your JSON-LD code inside the widget.
- Click Update to save changes.
Here’s an example of JSON-LD code:
Using Schema Markup improves your website’s SEO. It helps search engines understand your content better. By using HTML widgets and JSON-LD code, you make your site more search-friendly.
Schema Markup Plugins
Adding schema markup to your website enhances its visibility in search engines. Using plugins makes this task simple and efficient. Let’s explore some popular schema markup plugins, their installation, and setup process.
Popular Plugins
There are several plugins available that help integrate schema markup in Elementor. Here are some of the most popular ones:
- Schema Pro: A versatile plugin with extensive schema types.
- Rank Math: An SEO plugin with built-in schema support.
- All in One Schema Rich Snippets: Simple and effective for rich snippets.
- WP Review: Ideal for adding review schema markup.
Installation And Setup
Follow these steps to install and set up a schema markup plugin:
- Navigate to your WordPress dashboard.
- Click on “Plugins” and then “Add New”.
- Search for your chosen schema plugin (e.g., Schema Pro).
- Click “Install Now” and then “Activate”.
- After activation, go to the plugin settings.
- Configure the schema types you need for your site.
- Save your settings and test the markup using Google’s Rich Results Test.
Here’s a sample table to show different plugin features:
| Plugin | Free Version | Schema Types |
|---|---|---|
| Schema Pro | Yes | All major types |
| Rank Math | Yes | Basic types |
| All in One Schema Rich Snippets | Yes | Basic types |
| WP Review | Yes | Review types |
Using these plugins ensures your site is schema-ready in a few clicks. Proper setup can significantly improve your site’s search engine performance.

Credit: rankmath.com
Testing Your Schema Markup
After adding schema markup in Elementor, testing is crucial. It ensures your markup works correctly. Improper schema can affect your site’s SEO. Therefore, always test your schema. You can use various tools for this purpose.
Google’s Structured Data Testing Tool
Google offers a Structured Data Testing Tool. It helps you check your schema markup. This tool shows errors and warnings. It is easy to use and free. Follow these steps:
- Open the Structured Data Testing Tool.
- Paste your webpage URL or code snippet.
- Click on the “Run Test” button.
The tool will display your schema results. Look for any errors or warnings. Fix them as needed.
Common Errors And Fixes
Errors in schema markup are common. Here are some frequent issues and fixes:
| Error | Fix |
|---|---|
| Missing required fields | Add all required fields in your schema. |
| Invalid values | Ensure your values match the schema type. |
| Incorrect nesting | Make sure all elements are properly nested. |
Always re-test after making changes. This ensures your schema is error-free. A clean schema improves your SEO.
Monitoring Seo Performance
Once you’ve added Schema Markup in Elementor, it’s crucial to monitor your SEO performance. This ensures your efforts are yielding results. Proper monitoring helps you adjust strategies for better outcomes.
Using Google Analytics
Google Analytics is a powerful tool to track your website’s performance. First, set up a Google Analytics account. Then, link it with your Elementor site.
Here’s a simple step-by-step process:
- Sign in to Google Analytics.
- Click on “Admin” and select your property.
- Under “Tracking Info,” get your Tracking ID.
- Go to Elementor and add the Tracking ID in the settings.
With Google Analytics, you can monitor:
- Page views
- Bounce rates
- Session durations
- User demographics
Tracking Keyword Rankings
Tracking your keyword rankings helps you understand how well your content is performing. Use tools like Google Search Console or third-party services.
Here’s how you can track keyword rankings:
- Sign in to Google Search Console.
- Navigate to the “Performance” report.
- Check the “Queries” tab to see keyword performance.
You can also use tools like:
- SEMrush
- Ahrefs
- Rank Tracker
Regularly tracking your keyword performance helps in making necessary adjustments. This keeps your SEO strategy effective.
Advanced Tips And Tricks
Adding schema markup using Elementor can boost your site’s SEO. This section shares advanced tips to enhance your schema strategy.
Combining Multiple Schemas
Combining multiple schemas can provide a comprehensive data structure. This helps search engines understand your content better.
For example, you can combine the Article schema with the Author schema. This offers detailed information about the article and its writer.
Use the following code to combine schemas:
{
  "@context": "https://schema.org",
  "@type": "Article",
  "author": {
    "@type": "Person",
    "name": "John Doe"
  },
  "headline": "How to Add Schema Markup in Elementor",
  "datePublished": "2023-10-10"
}
This code snippet provides comprehensive details about the article.
Keeping Schema Updated
Keeping your schema updated is crucial for SEO. Outdated schemas can mislead search engines.
Regularly review and update your schema data. Ensure that publication dates, author names, and other details are current.
Here’s a checklist for maintaining your schema:
- Review schema data every month
- Update publication dates
- Verify author information
- Check for new schema types
Frequently Asked Questions
What Is Schema Markup In Elementor?
Schema markup is a code that helps search engines understand your content. In Elementor, it enhances your site’s SEO by providing structured data.
How Do I Add Schema Markup In Elementor?
To add schema markup, use the HTML widget in Elementor. Insert your schema code within this widget to implement it on your page.
Why Is Schema Markup Important For Seo?
Schema markup improves your site’s visibility in search results. It helps search engines display rich snippets, making your content more attractive.
Can I Use Plugins For Schema Markup In Elementor?
Yes, several plugins can add schema markup. Popular options include Schema Pro and All in One Schema Rich Snippets.
Conclusion
Mastering schema markup in Elementor can boost your website’s SEO and user experience. Follow the steps to enhance search visibility. Implementing schema helps search engines understand your content better. Start today to make your site more appealing to both users and search engines.
Happy optimizing!


