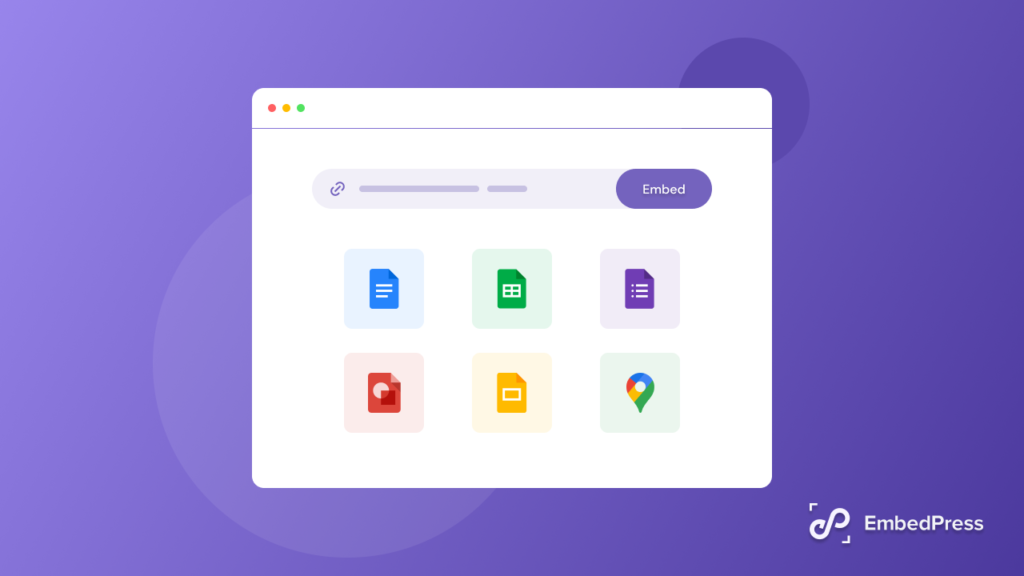
To display Google Drive in Elementor, use third-party plugins or embed custom HTML code. This integrates Google Drive files seamlessly.
Elementor, a popular WordPress page builder, allows users to create stunning websites with ease. Integrating Google Drive enhances functionality by enabling access to files directly from your website. Using third-party plugins or embedding custom HTML code provides a straightforward solution.
This integration saves time and improves user experience by centralizing file management. Whether you manage documents, images, or videos, displaying Google Drive in Elementor streamlines your workflow. Explore various plugins available for this purpose and choose one that fits your needs. This guide will help you effortlessly incorporate Google Drive into your Elementor-built site.
Prerequisites
Before displaying Google Drive files in Elementor, ensure you meet the prerequisites. This section will cover the basic requirements and necessary plugins.
Basic Requirements
To display Google Drive in Elementor, you need the following:
- WordPress Website: Ensure you have a WordPress site.
- Elementor Plugin: Install and activate Elementor.
- Google Account: A Google Drive account is essential.
Necessary Plugins
You need specific plugins to integrate Google Drive with Elementor. Here’s a list:
- Elementor Pro: The pro version of Elementor offers advanced widgets.
- Google Drive Addon: A plugin like “Embed Any Document” or “PDF Embedder”.
These plugins help connect Google Drive to Elementor. Ensure they are installed and activated on your WordPress site.

Credit: www.youtube.com
Setting Up Google Drive
Integrating Google Drive with Elementor can transform your website. It offers seamless file management and easy access to documents. Here’s a step-by-step guide to setting up Google Drive.
Creating A Google Drive Account
Creating a Google Drive account is simple. Follow these steps:
- Go to the Google Drive website.
- Click on the “Go to Google Drive” button.
- Sign in with your Google account or create a new one.
- Follow the prompts to set up your account.
Once done, you will have access to your Google Drive.
Organizing Your Files
Organizing your files in Google Drive is crucial for easy access. Here are some tips:
- Create folders: Click the “New” button and select “Folder”.
- Use subfolders: Organize files within folders for better management.
- Rename files: Right-click on a file and select “Rename”.
- Use color codes: Right-click on a folder and select “Change color”.
- Star important files: Right-click and select “Add to Starred”.
| Action | Steps |
|---|---|
| Create Folder | New > Folder |
| Rename File | Right-click > Rename |
| Color Code Folder | Right-click > Change color |
| Star File | Right-click > Add to Starred |
Following these tips will keep your Google Drive organized. This ensures quick and easy access to your files.
Installing Elementor
Elementor is a powerful tool for creating stunning websites with ease. Installing Elementor is simple and quick. Follow these steps to get started and display Google Drive in Elementor.
Elementor Installation Steps
First, you need to install the Elementor plugin on your WordPress site. Below are the steps to do this:
- Log in to your WordPress admin dashboard.
- Go to Plugins in the left sidebar.
- Click on Add New.
- In the search bar, type Elementor.
- Find the Elementor page builder and click Install Now.
Activating The Plugin
After installing the Elementor plugin, you need to activate it. Follow these simple steps to activate:
- Once installation is complete, click on Activate.
- Elementor will now be active on your site.
- You can find it in your WordPress sidebar under Elementor.
With Elementor active, you can start creating beautiful pages. Next, we will learn how to display Google Drive in Elementor.
Connecting Google Drive To Elementor
Connecting Google Drive to Elementor allows you to display files seamlessly. This integration enhances your website’s functionality and user experience. Follow these steps to connect Google Drive to Elementor easily.
Api Key Setup
To connect to Google Drive, you need to connect your WordPress site with your Google account. Follow these steps:
- Go to the WordPress Dashboard
2. Select the google account
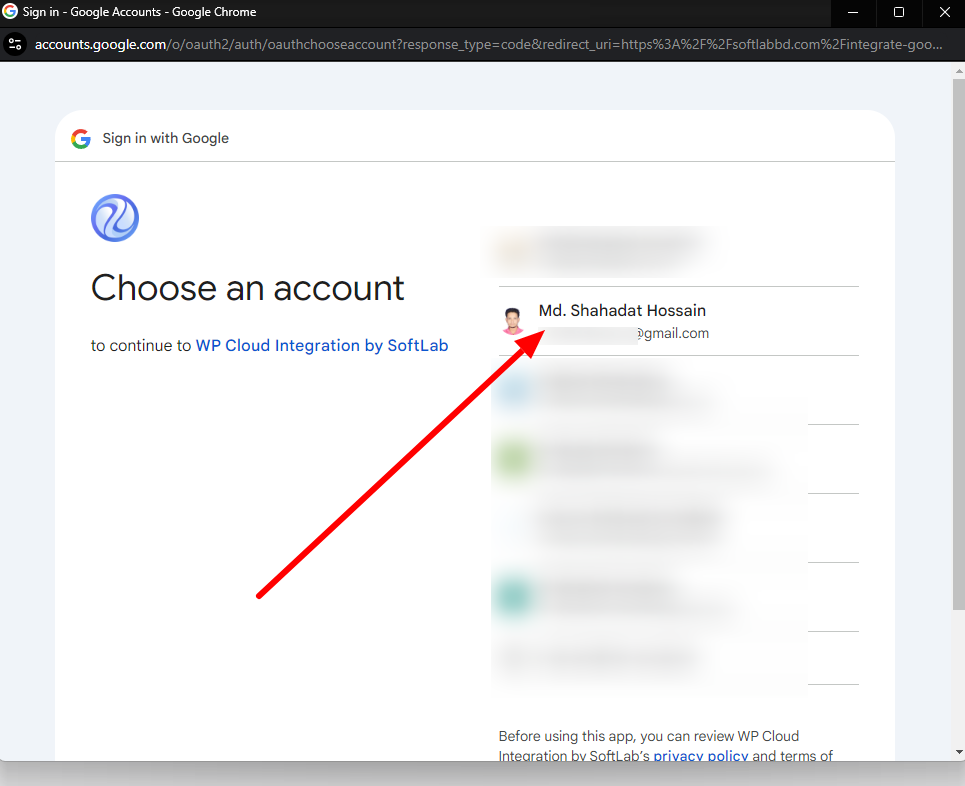
3. Click the Continue button
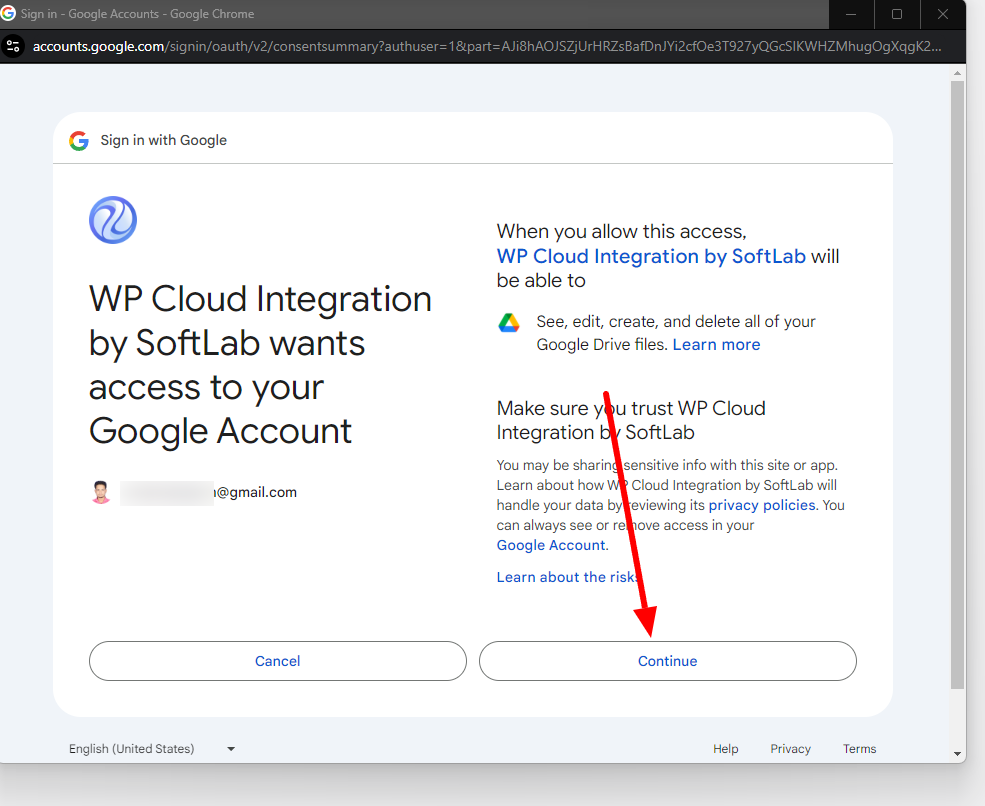
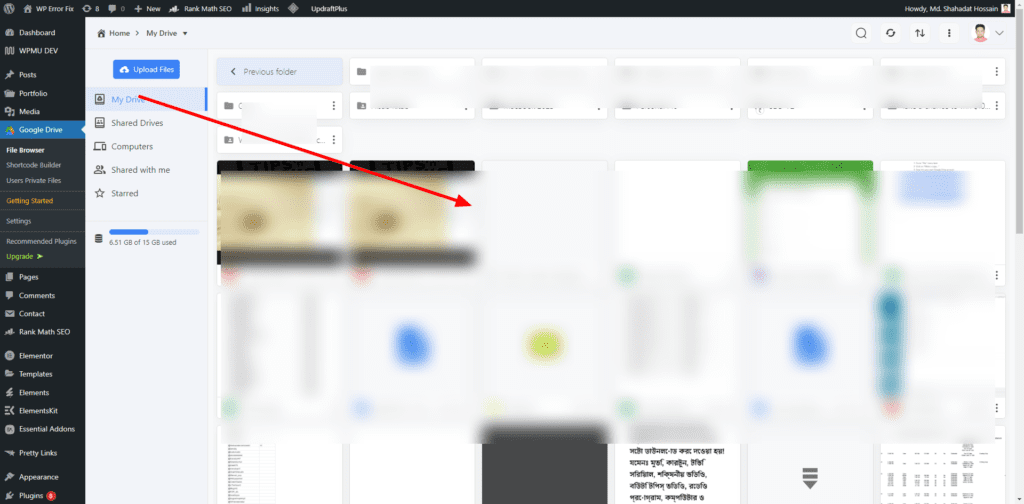
4. That’s all you’ve to do. Now you can see all the folders and files of your Google Drive from the WordPress dashboard
Authenticating Google Drive
After setting up and authenticate Google Drive:
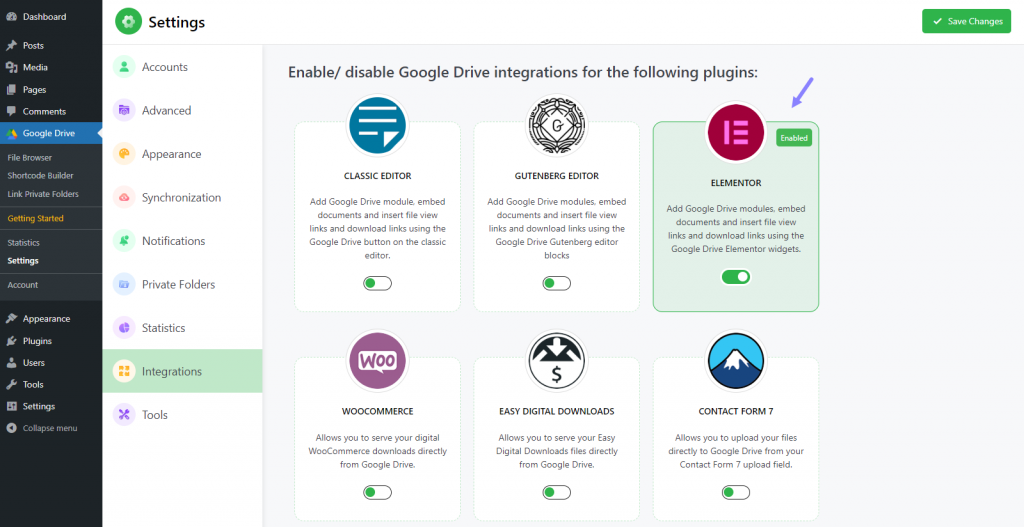
- Open Elementor on your WordPress dashboard.
- Go to Elementor Settings and navigate to the Integrations tab.
- Find the Google Drive section.
- Paste the API Key you copied earlier.
- Save changes to authenticate Google Drive.
Your Google Drive is now connected to Elementor. You can now display files directly from Google Drive on your website. This method enhances user engagement and streamlines file management.
Adding Google Drive Files To Elementor
Adding Google Drive files to your Elementor pages is simple. It enhances your website’s functionality by integrating crucial documents directly from Google Drive. Follow these steps to seamlessly display your files.
Using The Elementor Interface
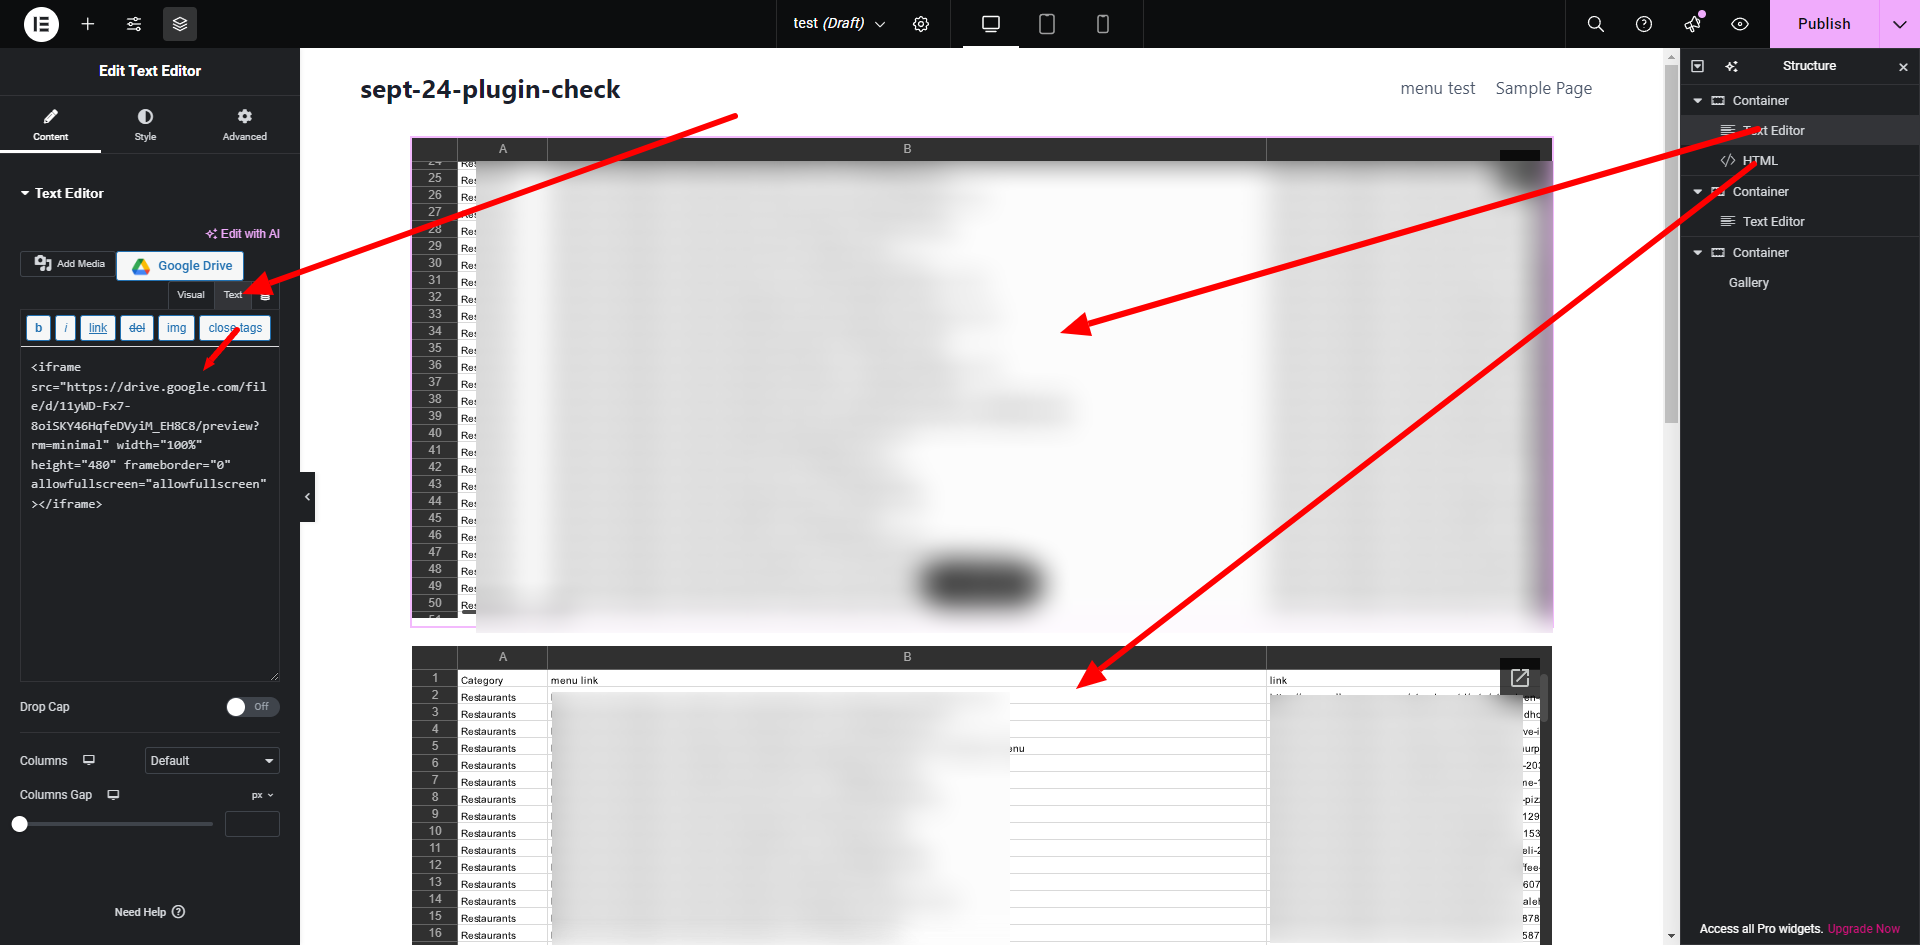
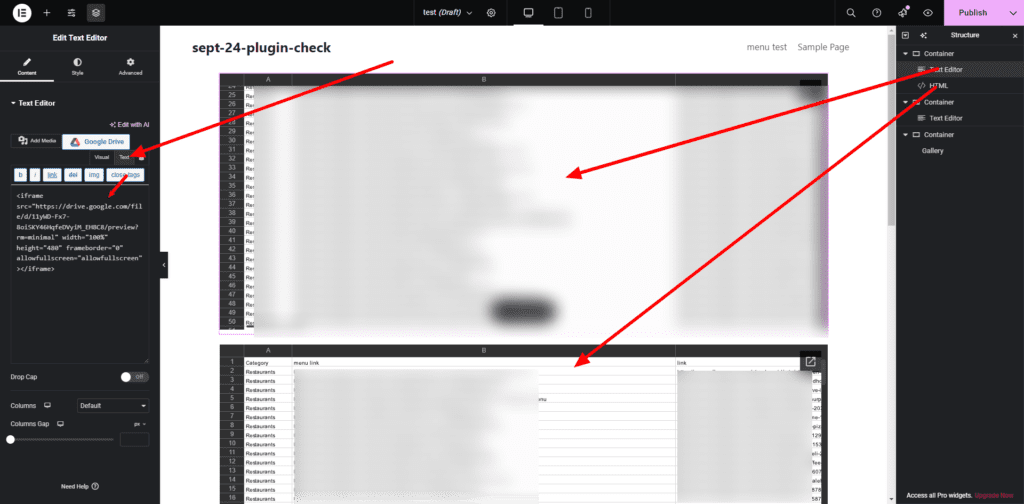
Open your Elementor editor. Select the page where you wish to display your Google Drive files. Drag and drop a Text Editor widget onto your page. This will be your placeholder for embedding the Google Drive files.
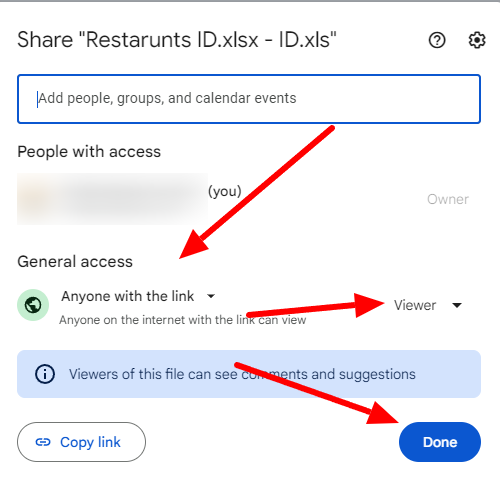
Next, go to your Google Drive and find the file you want to embed. Right-click on the file and select Get shareable link. Ensure the link sharing settings are set to “Anyone with the link can view”. Copy the shareable link.
Return to Elementor. Click on the Text Editor widget you added. In the text editor, switch to the Text tab to enter HTML. Paste the Google Drive shareable link here. You can customize the text displayed in the editor as needed.
Embedding Files
To embed a Google Drive file, You can use the following HTML code:
<iframe src="YOUR_GOOGLE_DRIVE_LINK" width="640" height="480" allow="autoplay"></iframe>
Replace YOUR_GOOGLE_DRIVE_LINK with the link you copied earlier. Adjust the width and height attributes to fit your design needs. This code ensures the file appears correctly on your Elementor page.
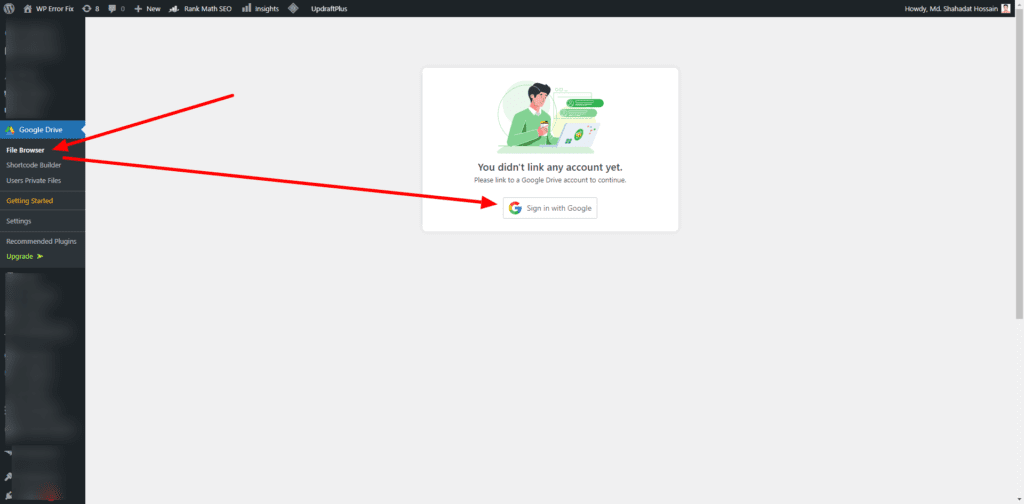
Get the Embedded link from the WordPress Dashboard
You can’t get the embedded link from the Google Drive directly. You can get it from the plugin named “Integrate Google Drive” that you just installed.
Follow the steps:
1. Navigate to the Google Drive page, select the file, right-click on it, and choose the ‘Share’ option.
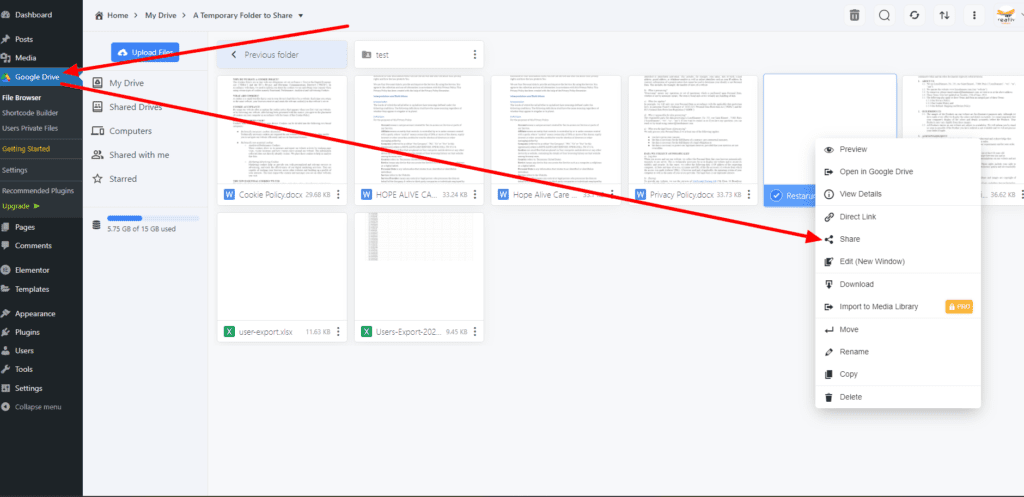
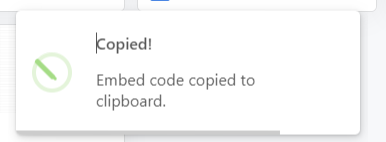
2. Click the ‘Embed’ button, then copy the code provided by clicking on it.
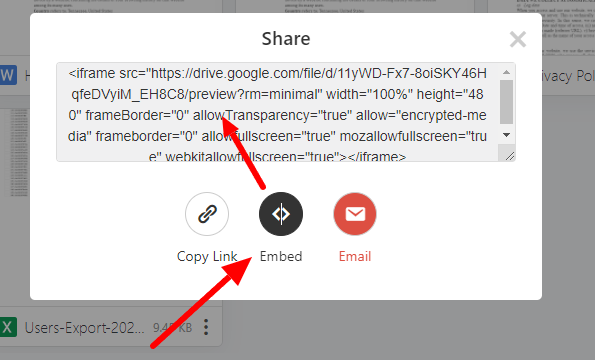
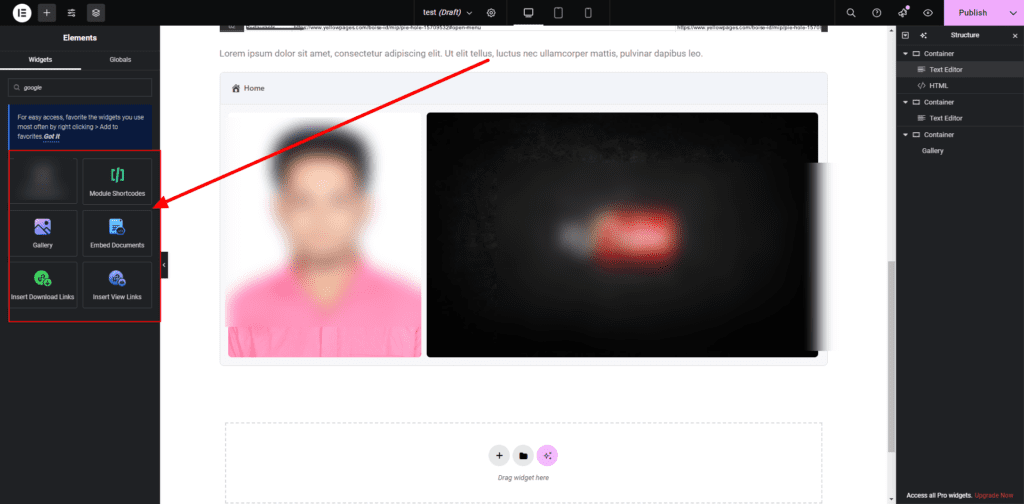
3. Now go to the Elementor page builder and use the “Text Editor” or the “HTML” widget to show the document you want.
You can also use these widgets from that plugin. You can get a gallery view of your google drive images.
One more thing. Make sure that you changed that Google Drive folder General access to Viewer.
You can embed various file types such as documents, spreadsheets, and presentations. Make sure the sharing settings on Google Drive are correct. This allows visitors to view the files without needing access permissions.
| File Type | Embed Code |
|---|---|
| Document | |
| Spreadsheet | |
| Presentation |
Embedding files from Google Drive into Elementor is straightforward. Use the HTML code snippet for seamless integration. Always check file sharing settings on Google Drive for smooth display.
Credit: embedpress.com
Customizing Display Options
Customizing the display options for Google Drive in Elementor enhances user experience. You can make your files more accessible and visually appealing. Here are some tips and tricks for you.
Styling Your Files
Proper styling helps users easily navigate through your Google Drive files. Use Elementor’s styling features for a clean look.
- Font Styles: Choose readable font sizes and types for file names.
- Colors: Use contrasting colors to highlight important files.
- Icons: Add custom icons to differentiate file types.
Use the following code snippet to style your Google Drive files:
/ CSS for styling Google Drive files in Elementor /
.google-drive-file {
    font-family: Arial, sans-serif;
    color: #333;
    padding: 10px;
    border-bottom: 1px solid #ccc;
}
.google-drive-file:hover {
    background-color: #f9f9f9;
}
Responsive Design Tips
Your Google Drive display must be responsive. This ensures it looks good on all devices.
- Use Elementor’s responsive settings to adjust file display for mobile and tablet views.
- Set the width of your file containers to 100% for mobile devices.
- Use media queries to make text and icons smaller on smaller screens.
Here’s an example of a media query:
/ Media Query for mobile view /
@media (max-width: 600px) {
    .google-drive-file {
        font-size: 14px;
    }
}
Follow these tips to ensure a seamless experience for all users.
Troubleshooting
Integrating Google Drive with Elementor can enhance your website’s functionality. Sometimes, issues arise that require troubleshooting. Here, we address common issues and quick fixes to help you resolve problems efficiently.
Common Issues
Many users face common issues when displaying Google Drive in Elementor. Here are some frequent problems:
- Google Drive files not showing in Elementor
- Authentication errors
- Permission issues
- Broken links or files not loading
Quick Fixes
We provide quick fixes for the most common issues. Follow these steps to resolve them:
| Issue | Quick Fix |
|---|---|
| Files not showing | Check your Google Drive folder permissions.Ensure files are shared publicly.Reload the Elementor editor. |
| Authentication errors | Re-authenticate Google Drive in Elementor settings.Clear your browser cache.Update Elementor to the latest version. |
| Permission issues | Verify Google Drive sharing settings.Ensure you have edit access to the files.Check user roles in Elementor settings. |
| Broken links | Re-check the Google Drive file links.Update any outdated links in Elementor.Ensure links are not restricted. |
Credit: softlabbd.com
Conclusion
Integrating Google Drive with Elementor enhances your website’s functionality. It streamlines file access and sharing. This combination offers convenience and efficiency. Follow the steps outlined in this guide for a seamless integration. Elevate your site’s user experience with this powerful feature.
Start leveraging Google Drive in Elementor today.