Elementor header broken issues often arise from plugin conflicts or incorrect theme settings. Updating or reconfiguring can usually resolve the problem.
Elementor is a popular page builder for WordPress, known for its flexibility and ease of use. Users sometimes experience issues with their headers, which can disrupt the website’s appearance and functionality. Common causes include plugin conflicts, outdated versions, or incorrect theme settings.
Addressing these issues promptly ensures a smooth user experience and maintains your site’s professionalism. Regular updates and careful plugin management can prevent many of these problems. Understanding the root cause is essential for a quick fix. Proper configuration and regular maintenance keep your Elementor headers functioning seamlessly. This guide will help you troubleshoot and resolve common Elementor header issues effectively.

Credit: wpocopo.com
Common Causes
The Elementor header breaking can be a frustrating issue, especially when it disrupts the look and feel of your website. Identifying the common causes is essential for troubleshooting and resolving the problem quickly. This guide dives into the most frequent culprits, including plugin conflicts, theme issues, and caching problems.
Plugin Conflicts
Plugin conflicts are a common cause of a broken Elementor header. Plugins add functionality but sometimes they clash with each other or with Elementor. This can lead to display issues, including a broken header.
To diagnose plugin conflicts, consider the following steps:
- Deactivate all plugins except Elementor and Elementor Pro.
- Reactivate each plugin one at a time.
- Check the header after each activation.
This process helps identify the conflicting plugin. Once found, you can:
- Look for an update to the problematic plugin.
- Contact the plugin’s support for assistance.
- Consider using an alternative plugin.
Some common plugins known to conflict with Elementor include:
| Plugin Name | Description |
|---|---|
| Yoast SEO | Popular SEO plugin, sometimes causes layout issues. |
| WooCommerce | eCommerce plugin, can lead to styling conflicts. |
| WP Super Cache | Caching plugin, may cause display issues. |
Theme Issues
Theme issues often contribute to a broken Elementor header. Themes control the overall layout and design of your site, and sometimes they are not fully compatible with Elementor.
Steps to identify theme-related problems:
- Switch to a default WordPress theme like Twenty Twenty-One.
- Check if the header issue persists.
If the problem resolves, your theme is likely the culprit. You can:
- Update your current theme.
- Contact the theme developer for support.
- Switch to a theme known to be compatible with Elementor.
Common themes that work well with Elementor:
| Theme Name | Description |
|---|---|
| Astra | Lightweight and highly compatible with Elementor. |
| OceanWP | Flexible and Elementor-friendly. |
| GeneratePress | Fast and works seamlessly with Elementor. |
Caching Problems
Caching problems can cause a broken Elementor header. Caching improves site speed by storing copies of your pages, but it can also lead to outdated content being displayed.
Steps to troubleshoot caching issues:
- Clear your browser cache.
- Clear your website’s cache from your caching plugin.
- Clear any server-side cache if applicable.
Common caching plugins include:
| Plugin Name | Description |
|---|---|
| WP Super Cache | Easy-to-use caching plugin. |
| W3 Total Cache | Advanced caching options. |
| WP Rocket | Premium caching with user-friendly settings. |
Always clear caches after making design changes to ensure your Elementor header displays correctly. This ensures the most recent version of your site is shown to visitors.

Credit: m.youtube.com
Troubleshooting Steps
Experiencing a broken Elementor header can be frustrating, especially if it disrupts your site’s appearance. To resolve this, follow these troubleshooting steps to fix your Elementor header design. These steps will guide you through the process of clearing your cache, checking for updates, updating URLs, and disabling plugins.
Clear Cache
Clearing the cache is the first step in troubleshooting a broken Elementor header. Cached files might cause outdated data to display, disrupting the Elementor design. Follow these steps to clear the cache:
- Browser Cache: Open your browser settings and clear the browsing data. Ensure you select the cache option.
- WordPress Cache: If you use a caching plugin like W3 Total Cache or WP Super Cache, clear the cache from the plugin’s settings.
- Server Cache: Some web hosts provide server-level caching. Access your hosting control panel and clear the server cache.
Regularly clearing your cache ensures that you always see the most recent version of your site. This simple step can often resolve display issues caused by outdated or corrupted files.
Check For Updates
Ensuring that your Elementor and WordPress installations are up-to-date is crucial. Outdated versions can lead to compatibility issues, causing your Elementor header to break. Here’s how to check for updates:
- Elementor Updates: Navigate to Dashboard > Updates. If an update is available, click the “Update Now” button.
- WordPress Updates: In the same Updates section, look for WordPress core updates and click “Update Now” if available.
- Theme Updates: Go to Appearance > Themes and check for updates to your active theme.
Always back up your site before performing updates. This ensures you can restore your site if something goes wrong during the update process.
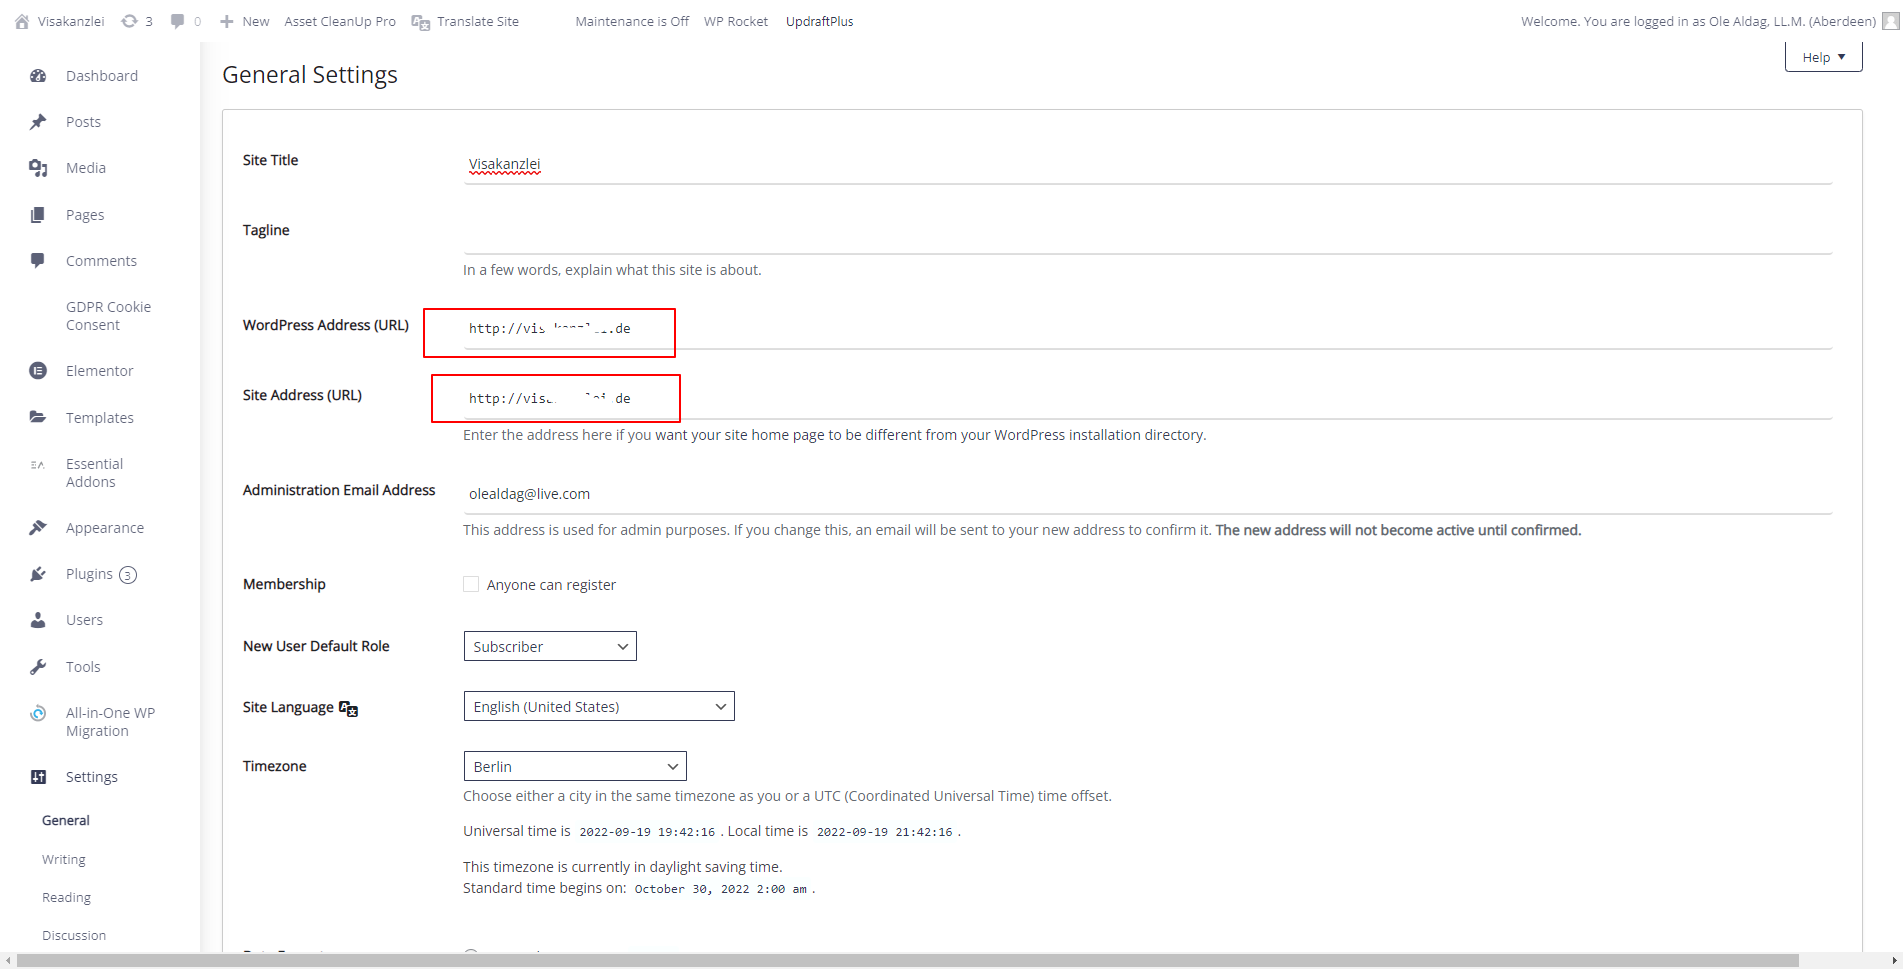
Update Urls From The Elementor Settings
Sometimes, broken URLs can cause issues with your Elementor header design. Updating the URLs from the Elementor settings can help resolve this:
- Go to Elementor > Tools in your WordPress dashboard.
- Select the “Replace URL” tab.
- In the “Old URL” field, enter your old website URL.
- In the “New URL” field, enter your new website URL.
- Click on the “Replace URL” button to update all URLs in your Elementor content.
Additionally, you can use the “Regenerate Files & Data” feature under Elementor > Tools. This ensures all Elementor data and files are refreshed, fixing any broken links or corrupted data.
Disable Plugins
Conflicting plugins can cause your Elementor header to break. Disabling plugins can help identify the culprit:
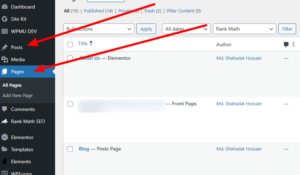
- Go to Plugins > Installed Plugins in your WordPress dashboard.
- Select all plugins and choose “Deactivate” from the bulk actions drop-down menu.
- Reactivate Elementor and Elementor Pro plugins first and check if the header issue persists.
- Activate each plugin one by one, checking your header design after each activation.
This process helps identify the conflicting plugin causing the issue. Once identified, consider finding an alternative plugin or contacting the plugin developer for support.
By following these troubleshooting steps, you can resolve most issues with a broken Elementor header and ensure your website looks its best.
Testing Header Layouts
Elementor is a powerful tool for designing websites, but sometimes the header layout can break. Fixing this issue requires thorough testing of header layouts. This ensures they work well on all devices and browsers. Let’s explore how to test header layouts to ensure they function perfectly.
Mobile Vs Desktop
Testing header layouts on both mobile and desktop is crucial. The design should be consistent across devices. Here are some key points:
- Screen Size: Mobile screens are smaller, so the header should adapt to fit.
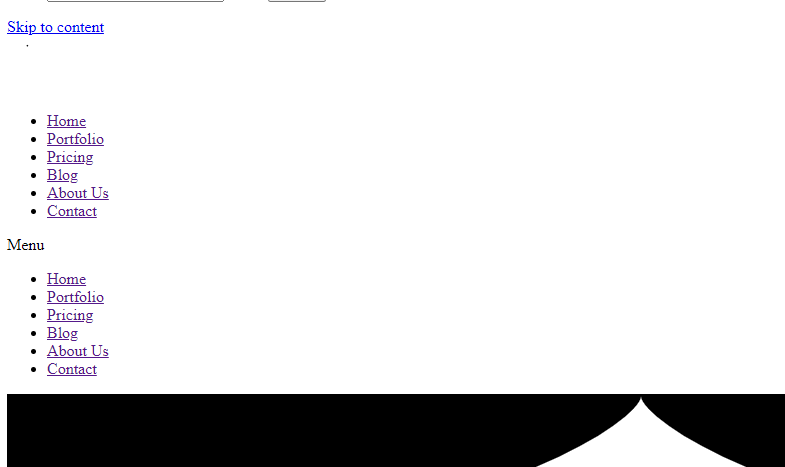
- Navigation Menu: On mobile, use a hamburger menu to save space.
- Text Size: Ensure text is readable on both mobile and desktop.
- Clickable Elements: Buttons and links should be easy to tap on mobile.
Below is a table showing common differences:
| Feature | Mobile | Desktop |
|---|---|---|
| Screen Size | Small | Large |
| Navigation | Hamburger Menu | Full Menu |
| Text Size | Medium | Large |
| Clickable Elements | Large | Standard |
Responsive Design
Responsive design ensures your header looks good on all devices. Here are some steps to achieve this:
- Use Media Queries: CSS media queries help adjust styles based on screen size.
- Flexible Grid Layouts: Use a grid system to create a flexible and adaptive layout.
- Fluid Images: Make images responsive so they scale with the screen size.
- Viewport Meta Tag: Include the viewport meta tag in your HTML to control layout on mobile browsers.
Here’s an example of a media query:
@media (max-width: 600px) {
  .header {
    font-size: 18px;
  }
}
Responsive design is essential for a seamless user experience. It ensures your header works well, no matter the device.
Cross-browser Testing
Cross-browser testing checks your header on different browsers. This ensures it works properly everywhere. Key browsers to test include:
- Google Chrome
- Mozilla Firefox
- Safari
- Microsoft Edge
Follow these steps for effective cross-browser testing:
- Use BrowserStack: This tool allows you to test on multiple browsers and devices.
- Check Compatibility: Ensure your CSS and JavaScript work across browsers.
- Fix Issues: Identify and fix any bugs or inconsistencies.
Cross-browser testing is vital. It guarantees your header is functional and visually appealing on all platforms.

Credit: www.reddit.com
Custom Css Solutions
Are you facing issues with a broken Elementor header? Custom CSS solutions might be the answer. Custom CSS allows you to fine-tune the appearance and behavior of your header. This approach ensures your header looks perfect on all devices. Let’s dive into how you can use Custom CSS to fix your Elementor header.
Inspecting Elements
First, you need to inspect the elements of your broken header. Understanding the problem is crucial. Use the browser’s developer tools for this task. Here’s how you can do it:
- Open your website in a browser.
- Right-click on the header and select Inspect.
- A panel will open showing the HTML and CSS of your site.
- Look for issues in the tag and its children.
During this inspection, pay attention to:
- Missing or incorrect CSS properties
- Overlapping elements
- Broken links or images
Identifying the problem helps in crafting a precise CSS solution. Take notes of any anomalies. This step ensures you address the root cause.
Applying Styles
With the problem identified, it’s time to apply custom styles. Use the WordPress Customizer or your theme’s Additional CSS section. Here’s a basic example:
header {
  background-color: #333;
  padding: 10px;
}
header .logo {
  width: 150px;
}
header nav {
  margin-top: 10px;
}
These CSS rules ensure your header has a consistent background and proper spacing. Adjust these values to fit your design. Some tips for applying styles:
- Keep your CSS organized
- Use comments to describe changes
- Test changes on different devices
A table can also help you keep track of your styles:
| Selector | Property | Value |
|---|---|---|
| header | background-color | #333 |
| header .logo | width | 150px |
| header nav | margin-top | 10px |
Applying these styles should fix common header issues. Make sure to save your changes.
Testing Changes
The final step is testing your changes. Ensure the header works on all devices and browsers. Follow these steps:
- Open your website on a desktop browser.
- Resize the browser window to check responsiveness.
- Use browser developer tools to simulate mobile devices.
- Check the header on different browsers like Chrome, Firefox, and Safari.
Testing ensures your header looks good everywhere. Here’s a checklist for testing:
- Header alignment
- Logo visibility
- Navigation menu functionality
- Responsive design
If you find issues, go back and tweak the CSS. Repeat the testing process until the header looks perfect. A broken header can be frustrating, but with custom CSS solutions, you can make it work seamlessly.
Using Elementor Tools
Discovering that your Elementor header is broken can be frustrating. But, with the right tools, fixing it becomes easier. Elementor offers several tools to help you troubleshoot and resolve issues quickly. Let’s explore some of these tools, including the Navigator Feature, History Panel, and Safe Mode.
Navigator Feature
The Navigator Feature in Elementor is like a map for your design. It helps you see the structure of your page clearly. This tool is essential when your header is broken because it allows you to find and fix the problem quickly.
Here are some key benefits of the Navigator:
- Easy Navigation: Move through your design elements effortlessly.
- Clear Structure: See the hierarchy of your elements.
- Quick Editing: Select and edit elements directly from the Navigator.
To use the Navigator:
- Click on the Navigator icon in the bottom left corner of the Elementor panel.
- A window will open displaying all your elements.
- Select the header element that is broken.
- Edit the settings or structure to fix the issue.
Using the Navigator, you can ensure that all elements are correctly placed. This feature saves time and makes fixing headers easier.
History Panel
The History Panel is another powerful tool in Elementor. It allows you to track and revert changes. If your header breaks, you can use the History Panel to restore it to a previous state.
Here are some advantages of the History Panel:
- Track Changes: See a list of all changes made to your design.
- Undo Mistakes: Revert to an earlier version if something goes wrong.
- Version Control: Maintain different versions of your design.
To use the History Panel:
- Click on the History icon in the bottom left corner of the Elementor panel.
- A window will open showing a list of changes.
- Scroll through the list to find the version before the header broke.
- Click on that version to revert your design.
The History Panel ensures you have a backup plan. It keeps your design safe from unexpected errors.
Safe Mode
Safe Mode in Elementor is a troubleshooting feature. It helps you identify problems by disabling certain plugins and themes. If your header is broken, Safe Mode can help you find the cause.
Advantages of using Safe Mode:
- Isolate Issues: Disable elements that might be causing problems.
- Test Changes: Make adjustments in a controlled environment.
- Identify Conflicts: Find out if plugins or themes are conflicting.
To activate Safe Mode:
- Go to Elementor > Tools in your WordPress dashboard.
- Click on the Safe Mode tab.
- Toggle the Safe Mode switch to on.
- Check if the header issue is resolved.
Using Safe Mode, you can troubleshoot without affecting your live site. It helps you fix the header issue without causing further problems.
Backup And Restore
Experiencing a broken header in Elementor can be frustrating. Backup and restore processes are crucial for preventing data loss and ensuring your site remains functional. This guide will help you create backups, restore previous versions, and use revisions effectively.
Creating Backups
Creating regular backups is essential. It ensures you can quickly recover your site if something goes wrong. To create a backup:
- Install a Backup Plugin: Use plugins like UpdraftPlus or BackupBuddy. These plugins make the backup process simple and automated.
- Schedule Regular Backups: Set up daily or weekly backups. This ensures your data is always up-to-date.
- Store Backups Off-site: Save backups on cloud storage like Google Drive or Dropbox. This protects your data from server failures.
Consider the following table for a quick overview of popular backup plugins:
| Plugin | Features | Storage Options |
|---|---|---|
| UpdraftPlus | Automated backups, restores | Google Drive, Dropbox, FTP |
| BackupBuddy | Full-site backups, restores | Amazon S3, Google Drive, FTP |
| WP Time Capsule | Incremental backups, restores | Amazon S3, Google Drive, Dropbox |
Restoring Previous Versions
Restoring a previous version of your site can resolve issues quickly. To restore from a backup:
- Access Your Backup Plugin: Open the plugin you used for backups.
- Select the Backup: Choose the most recent backup before the issue occurred.
- Initiate Restore: Click the restore button. The plugin will handle the rest.
For manual restoration:
- Download Backup Files: Access your cloud storage and download the backup files.
- Upload Files via FTP: Use an FTP client to upload the files to your server.
- Restore Database: Use phpMyAdmin to restore your database from the backup file.
Restoring previous versions ensures your site returns to a stable state swiftly.
Using Revisions
Elementor offers a revisions feature. This allows you to revert to earlier versions of your pages:
- Open Elementor Editor: Navigate to the page where the header is broken.
- Access Revisions: Click the History icon in the bottom panel.
- Review Changes: Browse through the list of revisions. Each entry shows the changes made.
- Restore Revision: Select a version from before the issue occurred and click Restore.
Using revisions is a quick way to undo changes that caused issues. It’s a handy feature for minor fixes and adjustments.
Incorporate these backup and restore practices to maintain a smooth and functional Elementor site.
Seeking Professional Help
Is your Elementor header broken? This issue can be frustrating, especially if it disrupts the user experience on your website. While DIY fixes are possible, sometimes the best approach is to seek professional help. Professionals can quickly diagnose and fix the issue, ensuring your site runs smoothly.
Hiring Experts
Hiring experts is a reliable solution for fixing a broken Elementor header. Professional developers have extensive experience and can resolve issues efficiently. Below are some reasons to consider hiring an expert:
- Speed: They can fix the issue quickly.
- Experience: Professionals understand complex problems.
- Reliability: They provide long-term solutions.
Here is a simple table to compare the benefits of hiring experts:
| Benefit | Description |
|---|---|
| Speed | Quick resolution of issues. |
| Experience | Deep understanding of Elementor. |
| Reliability | Long-term solutions, not just temporary fixes. |
Freelance Platforms
Using freelance platforms is a cost-effective way to find skilled professionals. These platforms host numerous freelancers specializing in Elementor. Here are some popular freelance platforms:
- Upwork: A wide range of professionals, flexible pricing.
- Fiverr: Affordable services, quick turnaround time.
- Freelancer: Various experts, competitive bidding.
Below is an example of how you can use these platforms:
- Create a detailed job post: Clearly describe your Elementor header issue.
- Review proposals: Evaluate bids from freelancers.
- Hire the best candidate: Choose based on reviews, experience, and price.
Freelance platforms offer flexibility and a wide talent pool, making them a great option for resolving your Elementor header problems.
Community Forums
Community forums can be incredibly helpful for troubleshooting Elementor header issues. Engaging with a community of users can provide valuable insights and solutions. Here are some popular forums:
- Elementor Community on Facebook: Active users, instant feedback.
- WordPress.org Forums: Expert advice, diverse topics.
- Stack Overflow: Technical answers, coding solutions.
Here are some steps to effectively use community forums:
- Search for similar issues: See if someone has already solved your problem.
- Post your question: Be clear and specific about your issue.
- Engage with responses: Follow up on advice and ask for clarifications if needed.
Forums provide a collaborative environment where you can find solutions and learn from others’ experiences.
Preventive Measures
One of the most annoying issues in web design is a broken Elementor header. It disrupts the user experience and can make your site look unprofessional. Thankfully, there are preventive measures that can help you avoid this problem. By following some best practices, you can keep your Elementor header working smoothly.
Regular Updates
Keeping your Elementor and WordPress up to date is crucial. Regular updates ensure that you have the latest features and security patches. Outdated plugins or themes can cause conflicts, leading to a broken header. Here’s how to keep everything updated:
- Update Elementor: Go to your WordPress dashboard, navigate to Plugins, find Elementor, and click ‘Update Now’.
- Update Themes: Go to Appearance, then Themes. Click ‘Update’ on your active theme.
- Update WordPress: Navigate to Dashboard, then Updates. Click ‘Update Now’.
It’s also a good idea to enable automatic updates for minor releases. This ensures you get essential fixes without manual intervention. Regular updates keep your site compatible with new features and reduce the risk of bugs.
Routine Maintenance
Routine maintenance helps catch issues before they become big problems. Regularly checking your website can help you identify and fix issues early. Here’s a checklist for routine maintenance:
- Backup Your Site: Always have a recent backup. Use plugins like UpdraftPlus to automate this.
- Check for Conflicts: Disable all plugins except Elementor. Activate them one by one to find any conflicts.
- Test on Multiple Devices: Check your site on different devices and browsers. This ensures your header looks good everywhere.
- Clean Your Database: Use plugins like WP-Optimize to clean up your database. A clean database improves performance.
By performing these maintenance tasks regularly, you can keep your Elementor header and overall site in top shape.
Optimizing Settings
Optimizing your Elementor settings can prevent many issues. Proper settings ensure that your header functions well and loads quickly. Here are some settings to optimize:
- Minimize CSS and JavaScript: Go to Elementor settings, navigate to Advanced, and enable the options to minimize CSS and JavaScript.
- Use Proper Header Templates: Choose a header template that is compatible with your theme. This reduces the chances of conflicts.
- Enable Safe Mode: If you experience issues, enable Safe Mode in Elementor. This helps you troubleshoot without affecting the live site.
Additionally, optimizing your server settings can make a significant difference. Use a reliable hosting provider and enable caching. This improves your site’s performance and reliability.
By keeping your settings optimized, you ensure a smooth user experience and a functional Elementor header.
Frequently Asked Questions
Why Is My Elementor Header Broken?
Your Elementor header might be broken due to plugin conflicts or outdated themes. Check for updates and disable conflicting plugins.
How Do I Fix A Broken Elementor Header?
To fix a broken Elementor header, update your plugins and themes. Clear your cache and check for conflicts.
Can Outdated Themes Affect Elementor Headers?
Yes, outdated themes can cause issues with Elementor headers. Ensure your theme is updated to the latest version.
Why Is My Header Not Displaying Correctly In Elementor?
Header display issues in Elementor can stem from CSS conflicts or misconfigured settings. Adjust settings or add custom CSS.
Conclusion
Fixing a broken Elementor header can enhance your site’s usability. Follow the steps above to resolve issues efficiently. Improving your site’s header boosts user experience and SEO performance. Stay ahead with regular updates and proactive maintenance. Your Elementor header will remain a reliable part of your website’s design.